How-to — task-oriented recipe.
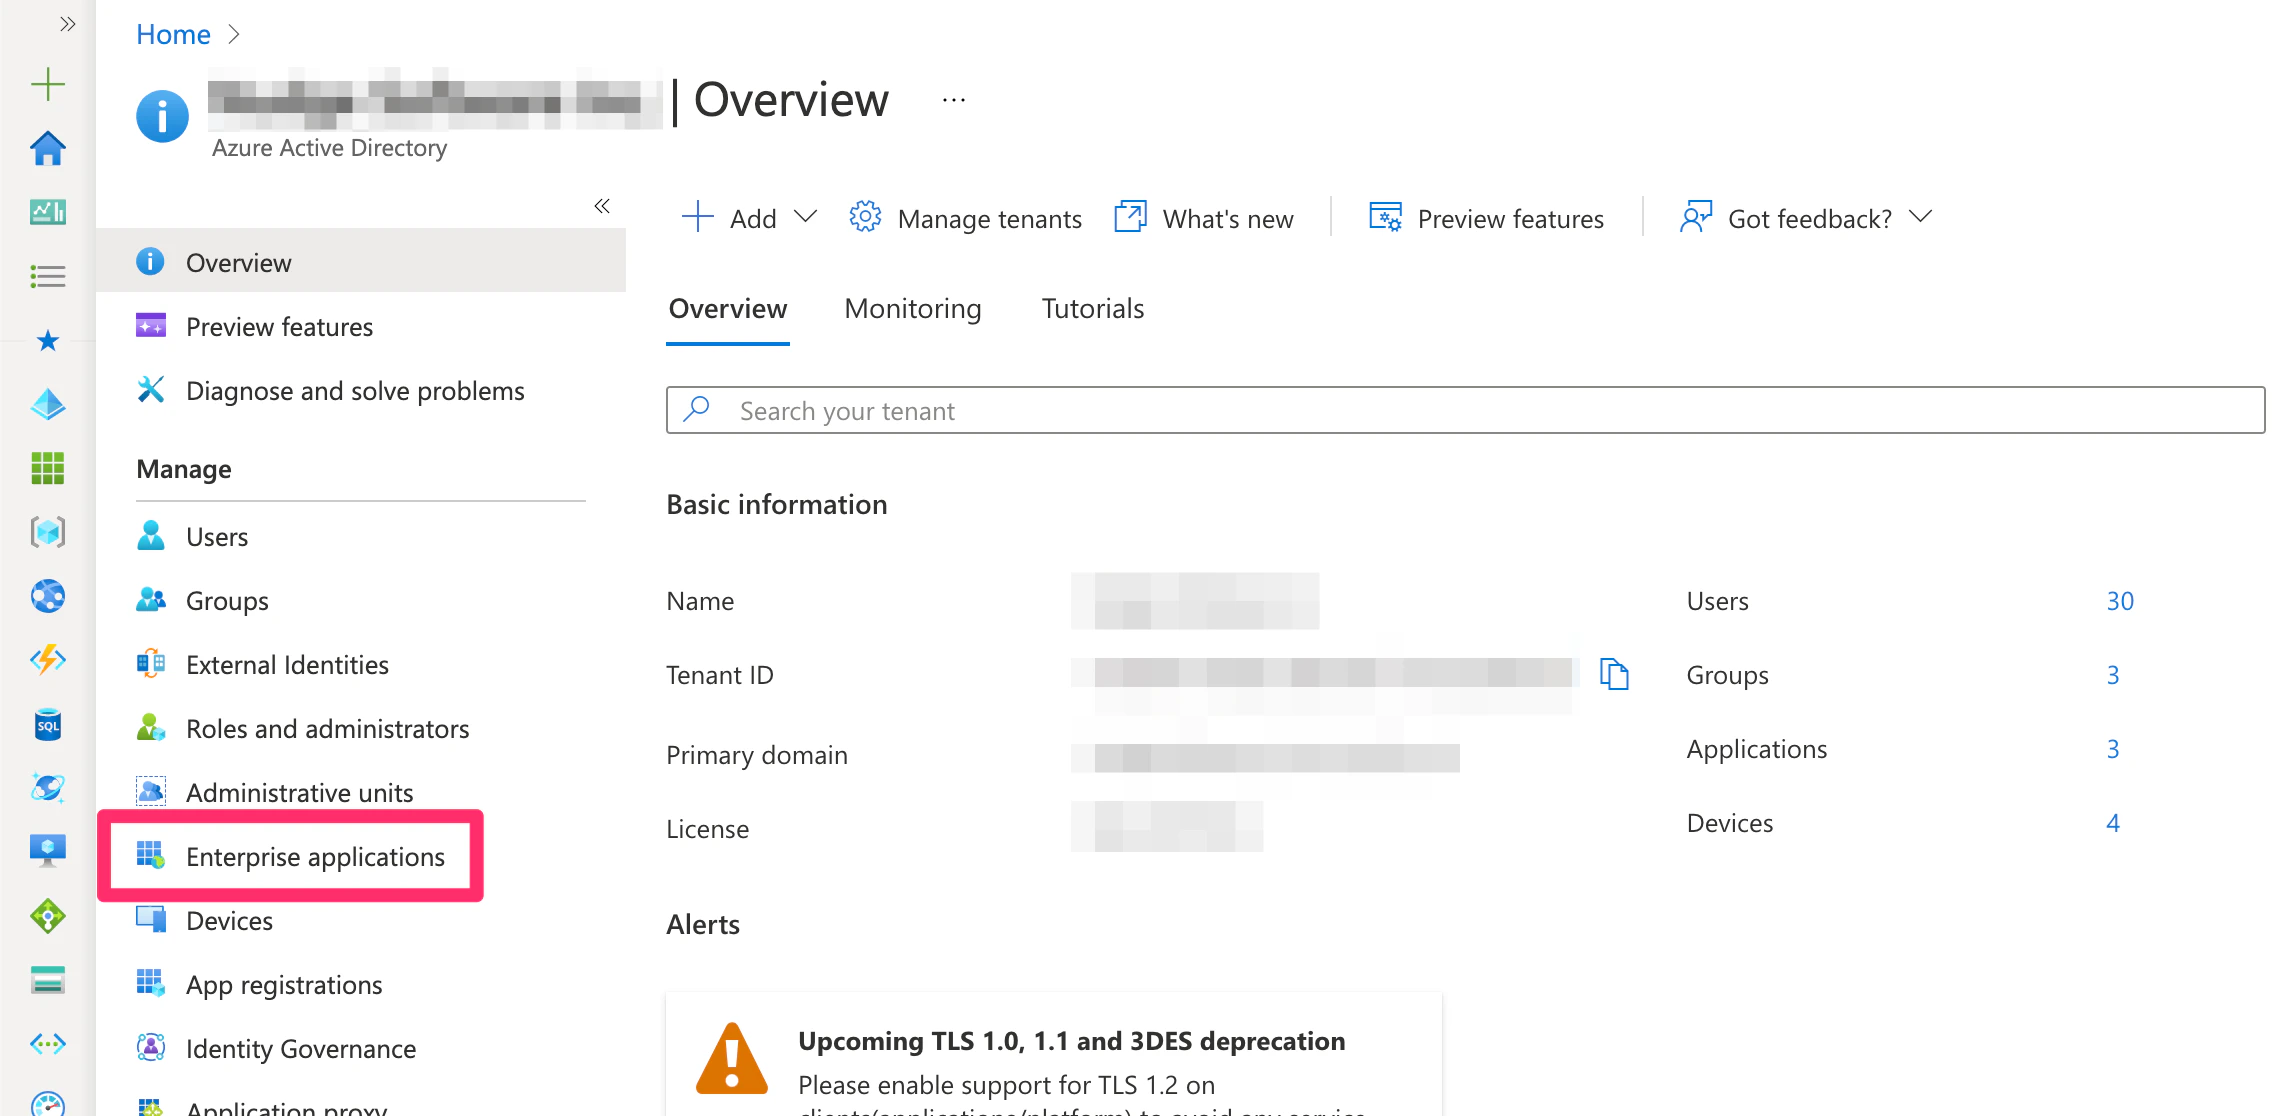
- From the Azure Home page, click on Enterprise applications on the left sidebar.
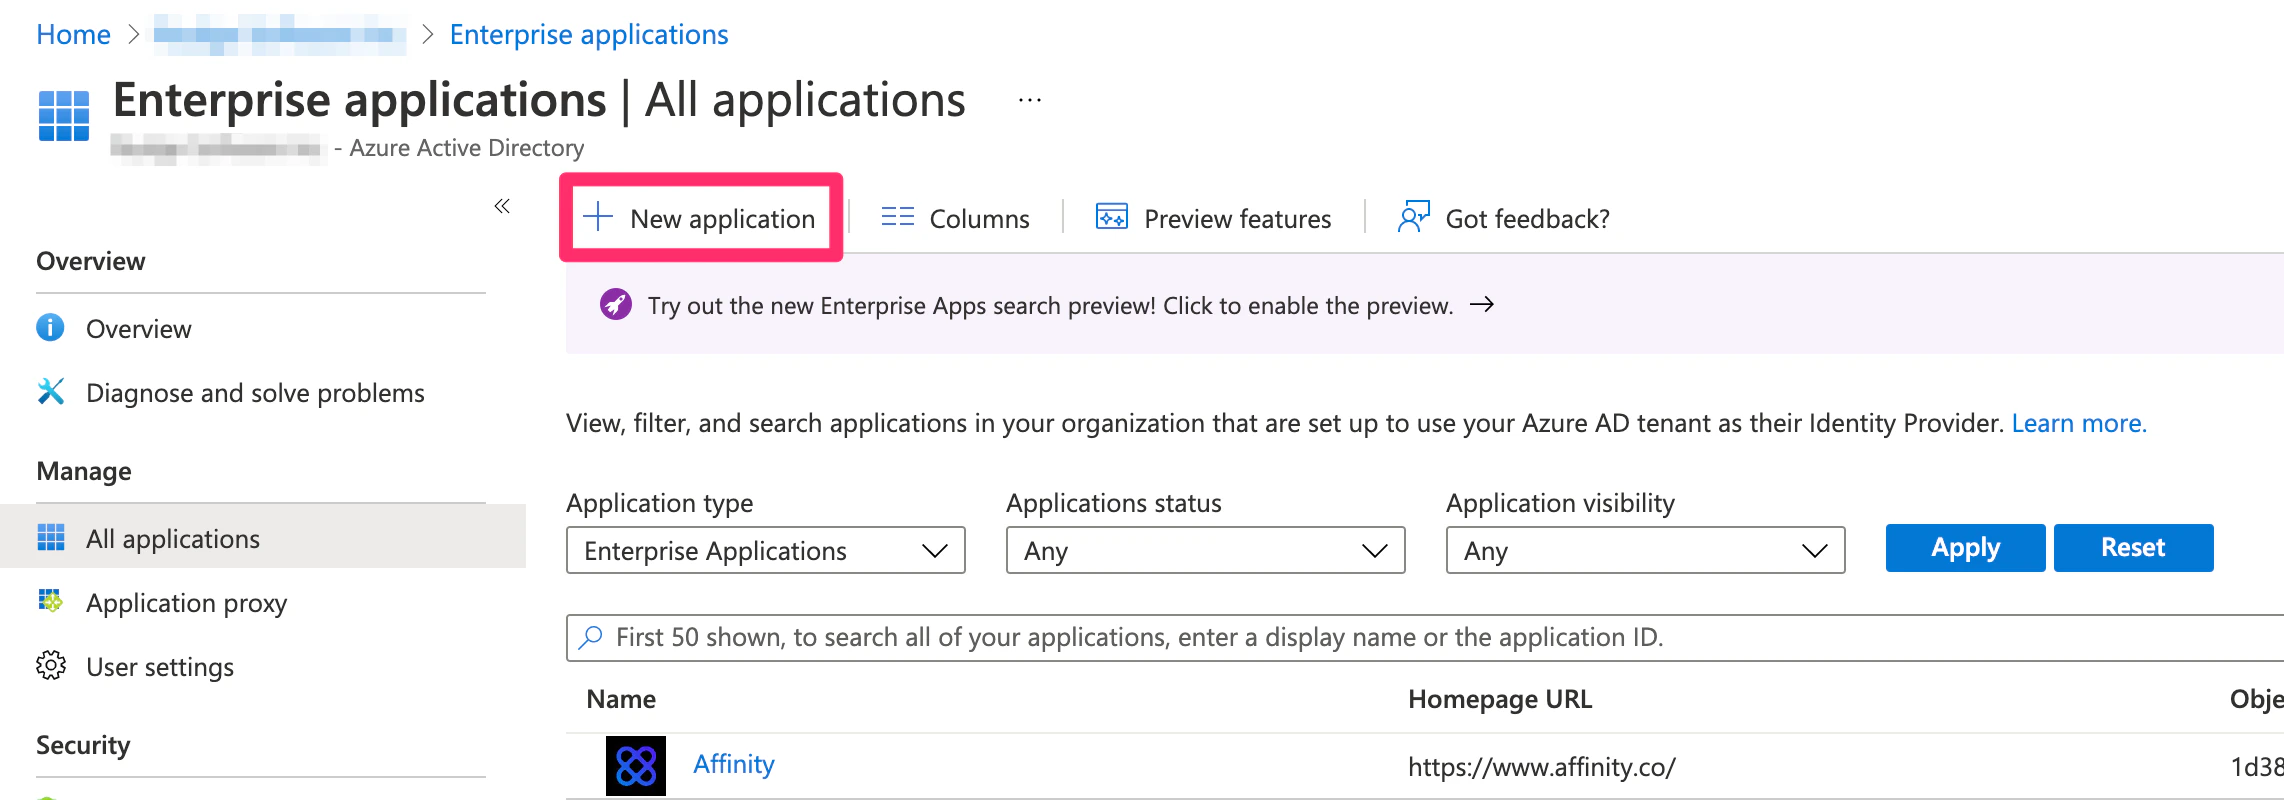
- Then, click New Application.
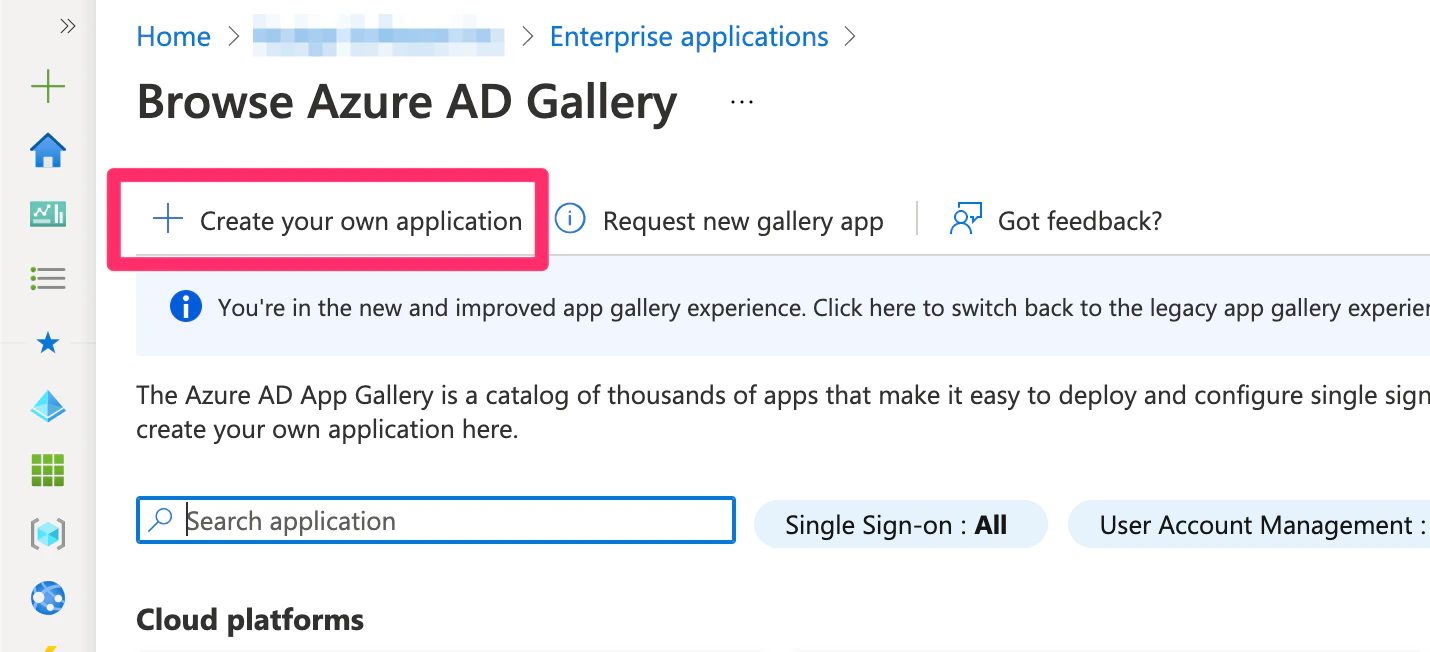
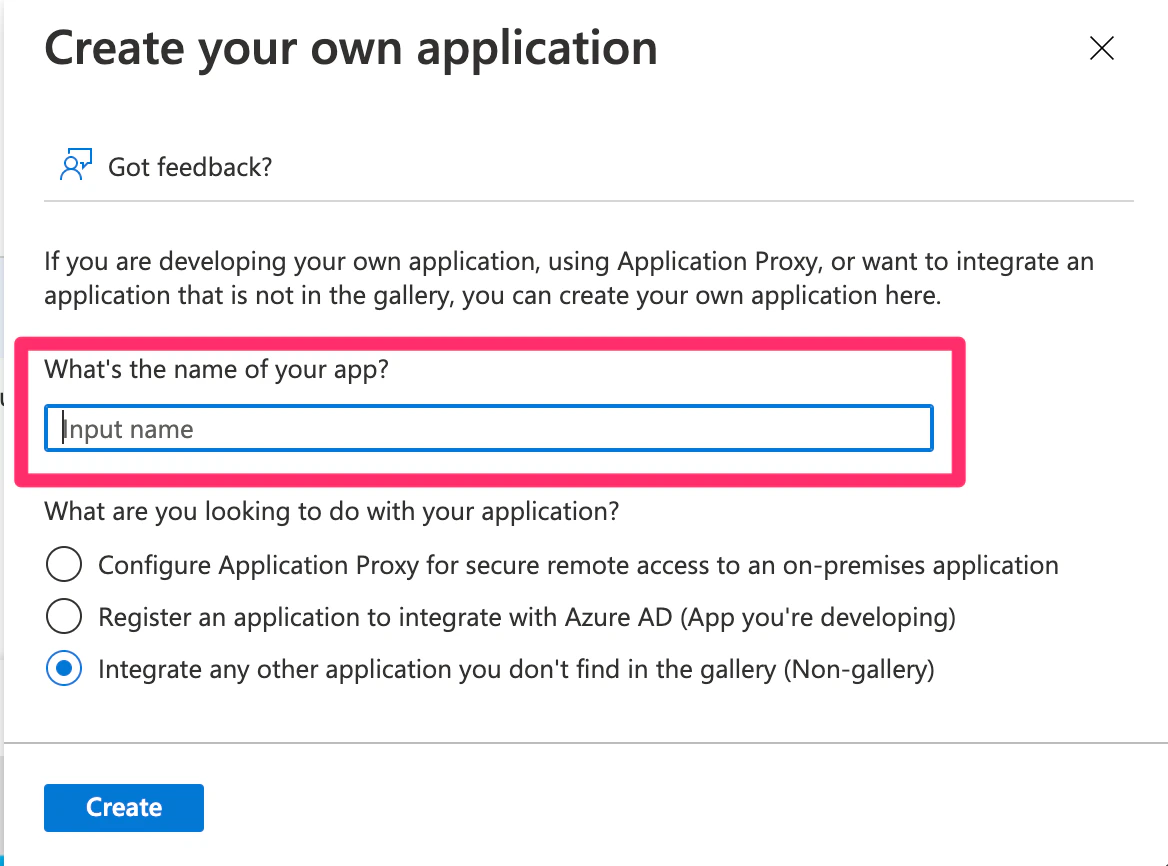
- Then, click Create your own application.
- In the slide out, type in the name of the application.
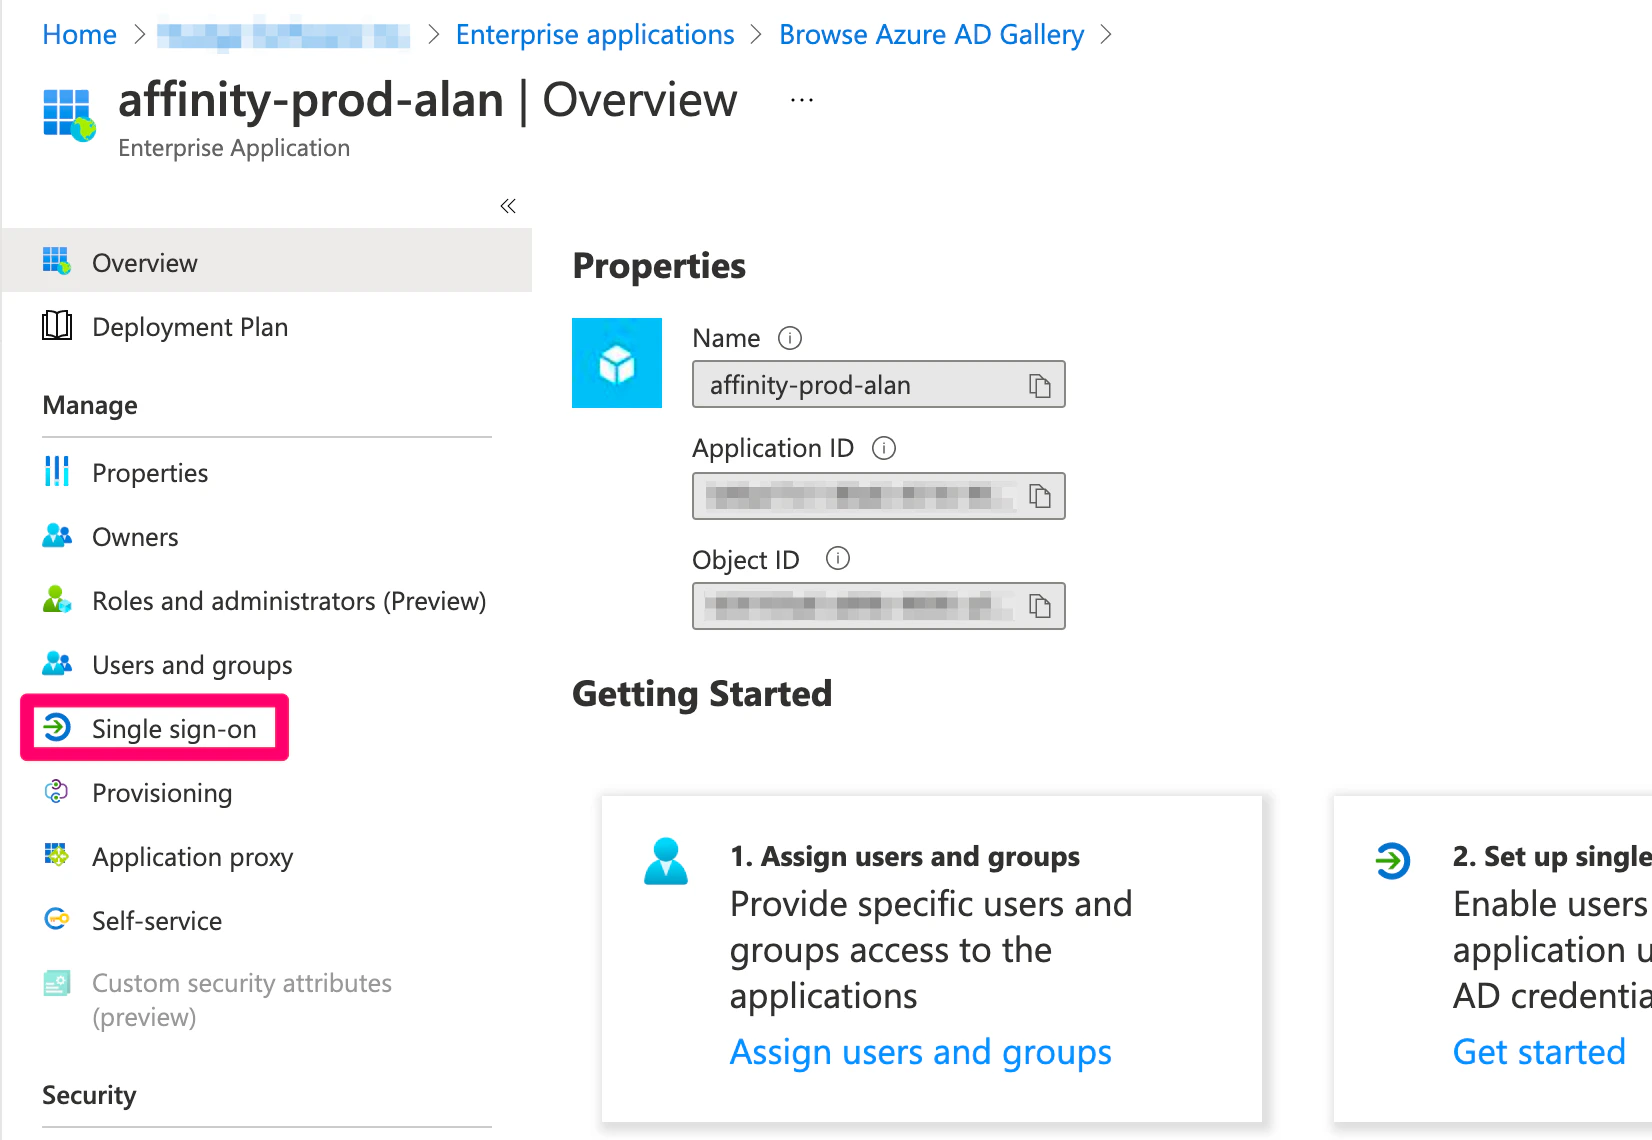
- Once the application is created, click the Single-sign on option on the left sidebar, then click SAML.
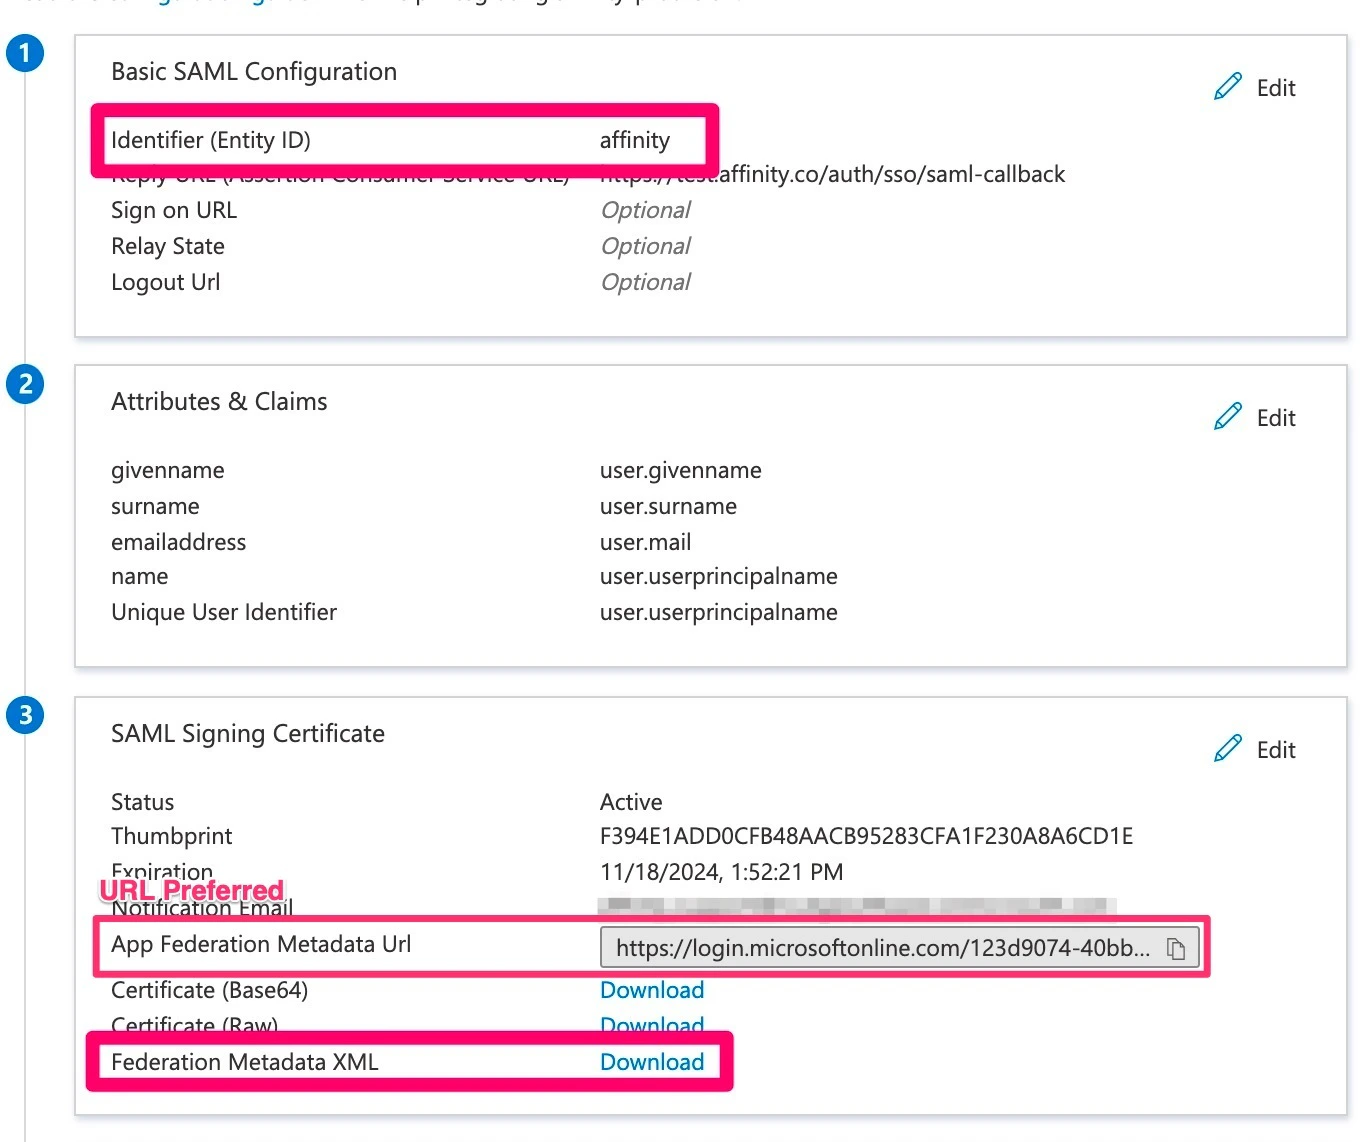
- There are two required fields you must fill out:
- Entity ID (Identifier) - type out “affinity” in lowercase. The Entity ID can be set to something other than “affinity”, but if so, please provide it during the following step below.
- Reply URL (Assertion Consumer Service URL / ACS URL) - copy and paste this link:
https://login.affinity.co/auth/{subdomain}/sso/saml-callbackbut make sure to replace subdomain with your actual Affinity subdomain.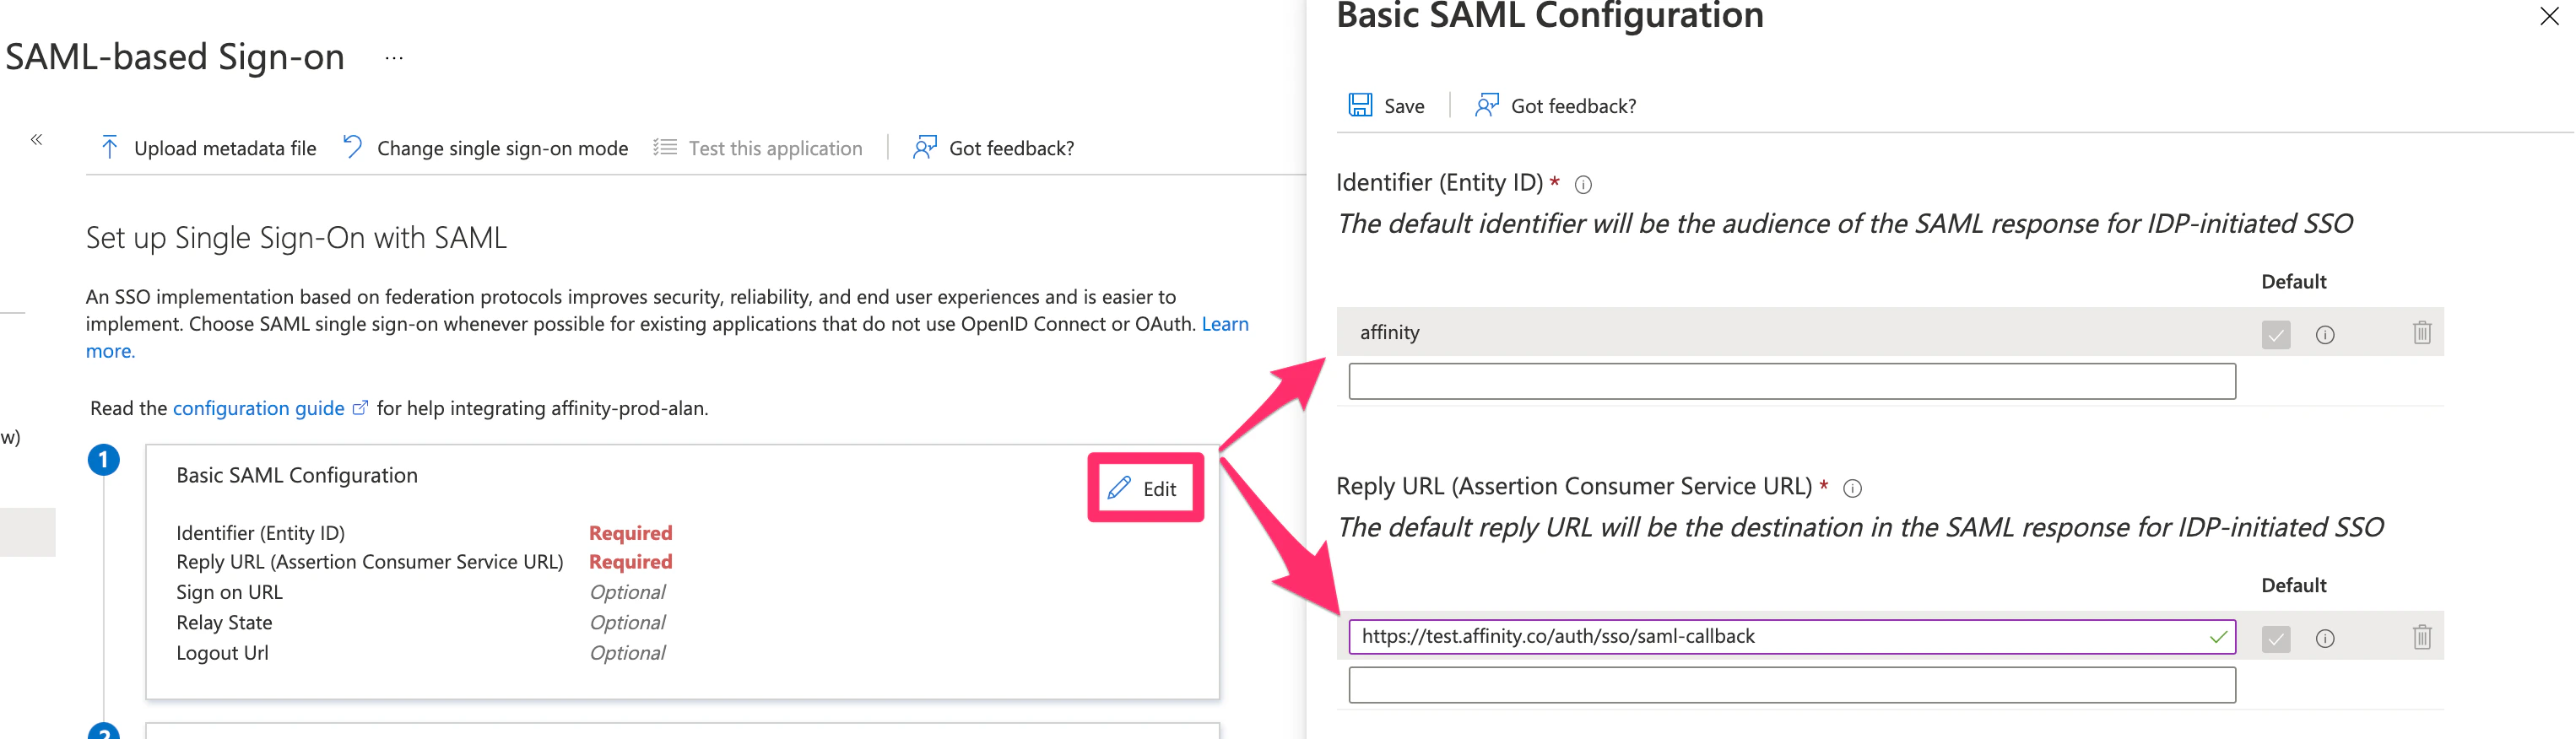
- Now, to confirm you have the appropriate claims, click Edit within the Attributes & Claims section.
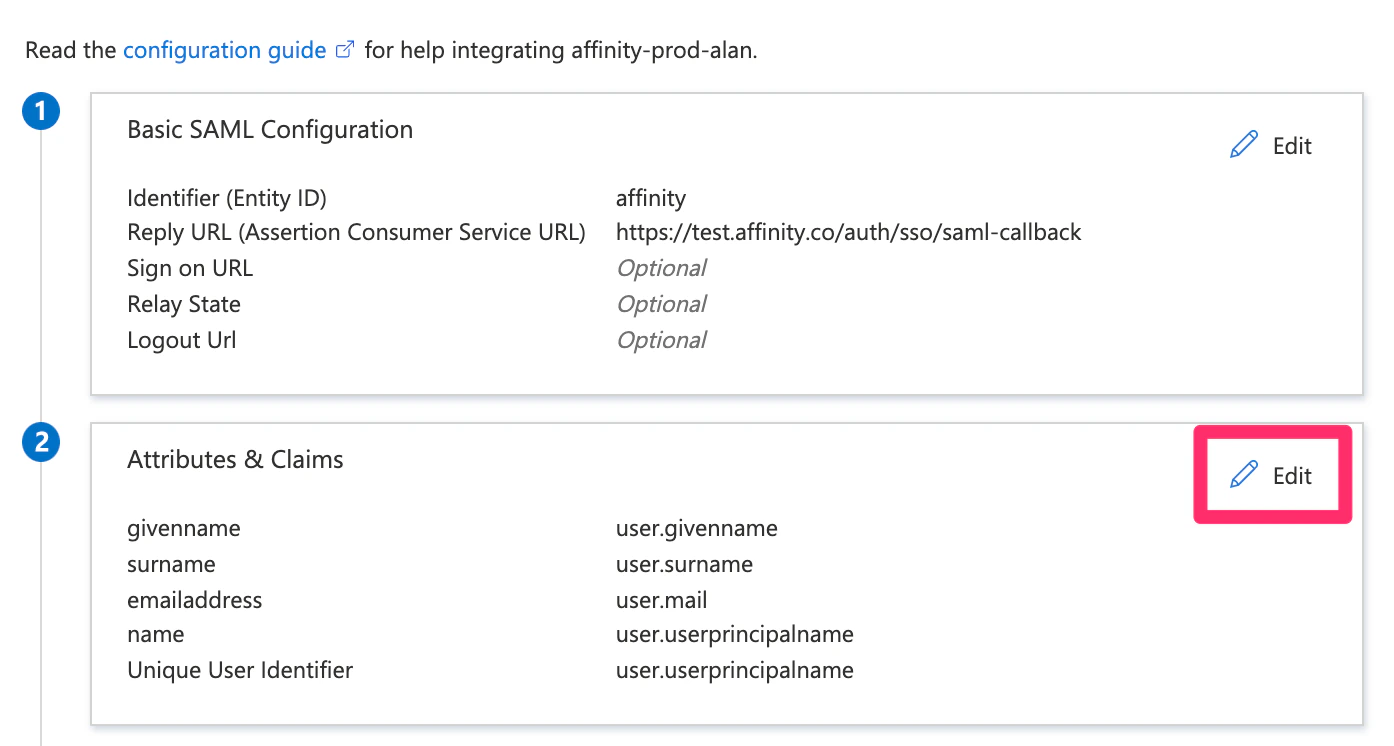
- Then, make sure that the following claim is there since they are required:
…/claims/emailaddress…user.mail. The other claims can be removed (optional).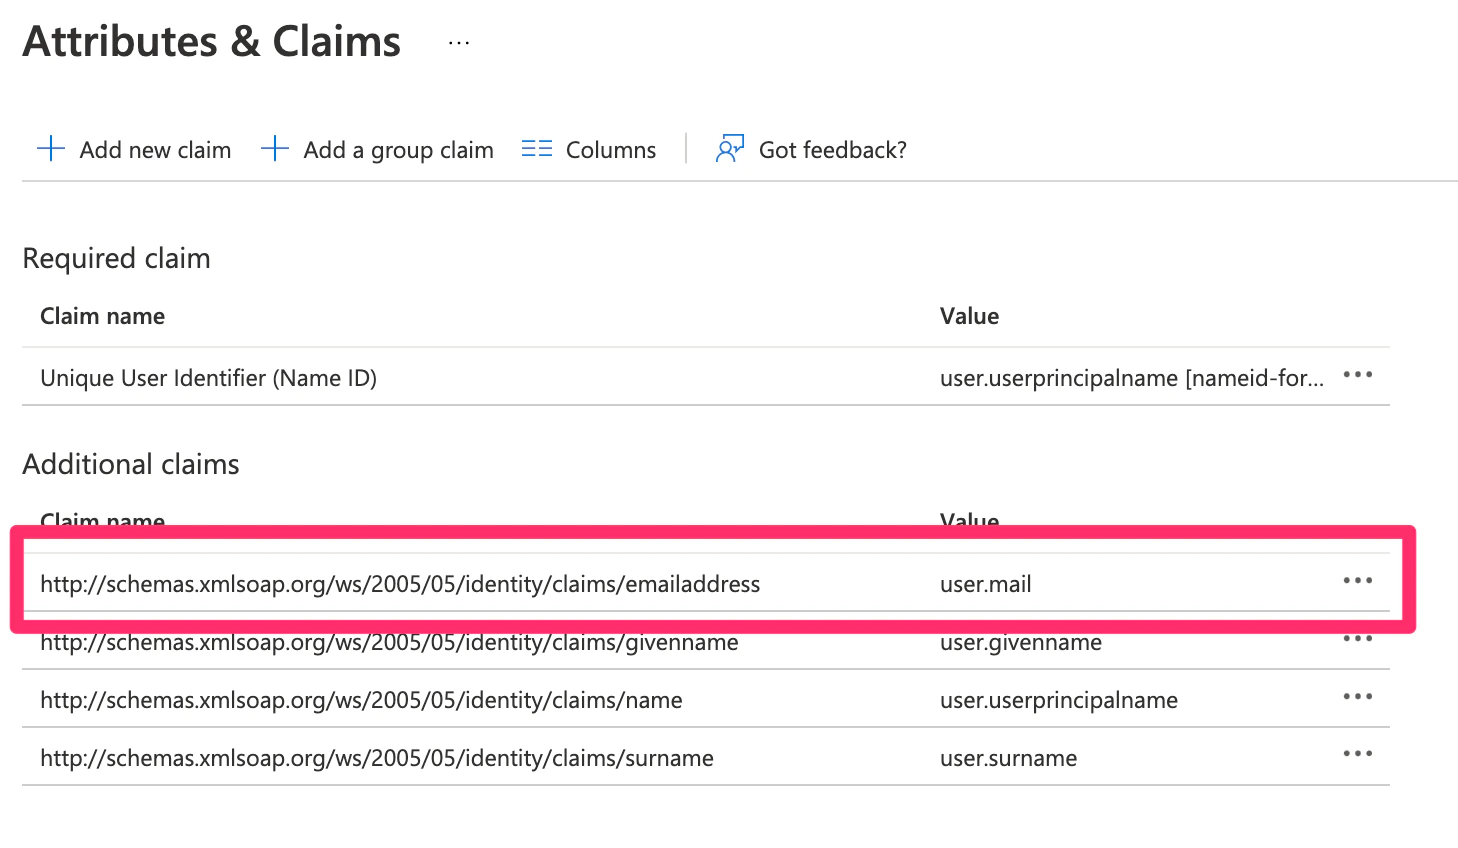
- Finally, head back to the SAML configuration page. Affinity requires that you provide the entity ID and the metadata URL/XML file. The metadata can be sent as an XML file, but preferably, we would like the Metadata URL that links to the raw data.