How-to — task-oriented recipe.
What you can export based on list type
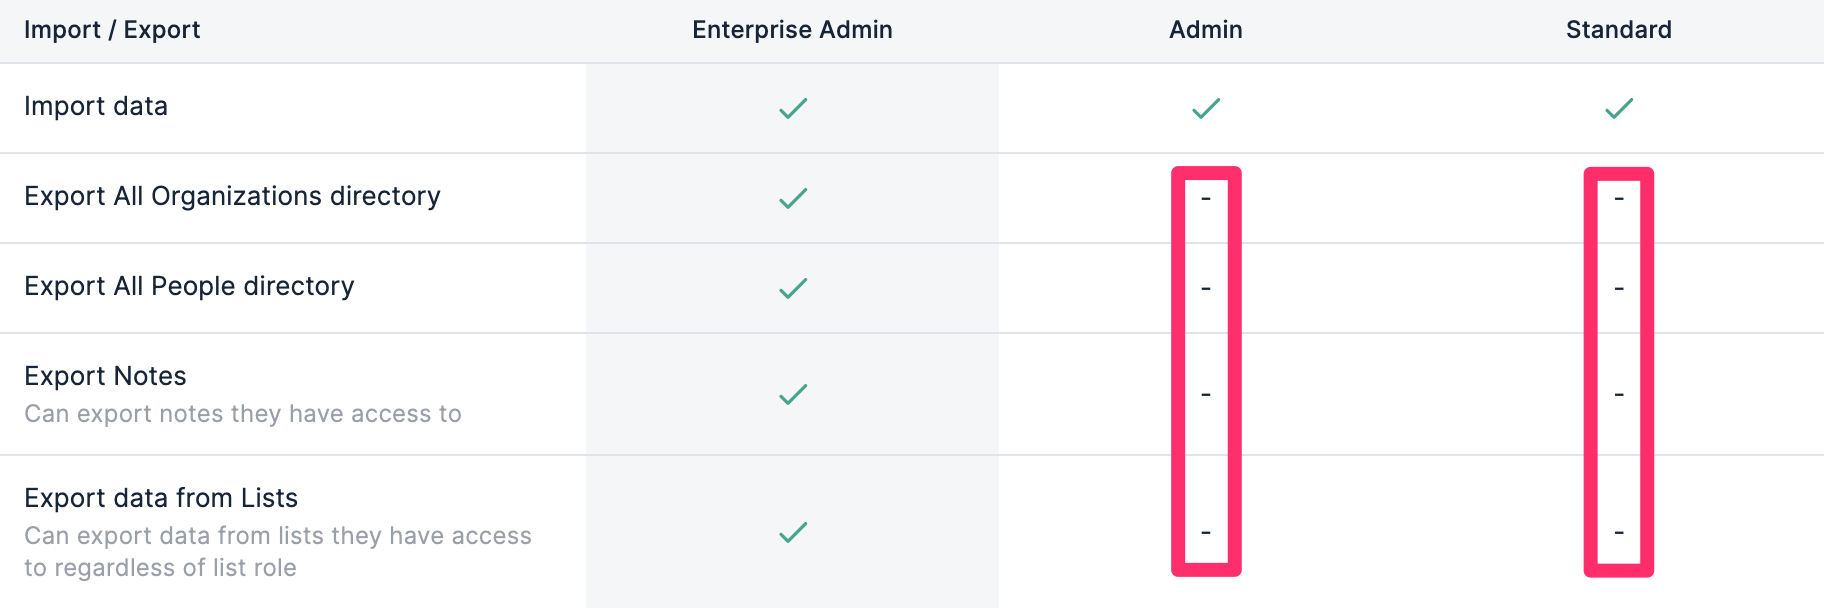
Depending on the list-type, here are the types of exports you can do within a list:| People lists | Organization lists | Opportunity lists | |
|---|---|---|---|
| Export this view as CSV | X | X | X |
| Export all notes in view | X | X | X |
| Export all people in view | X | X | X |
| Export all introductions in view | X | X |
How to export a list
- Make sure you include the appropriate columns in the saved view you plan to export (see How to customize saved views in your lists).
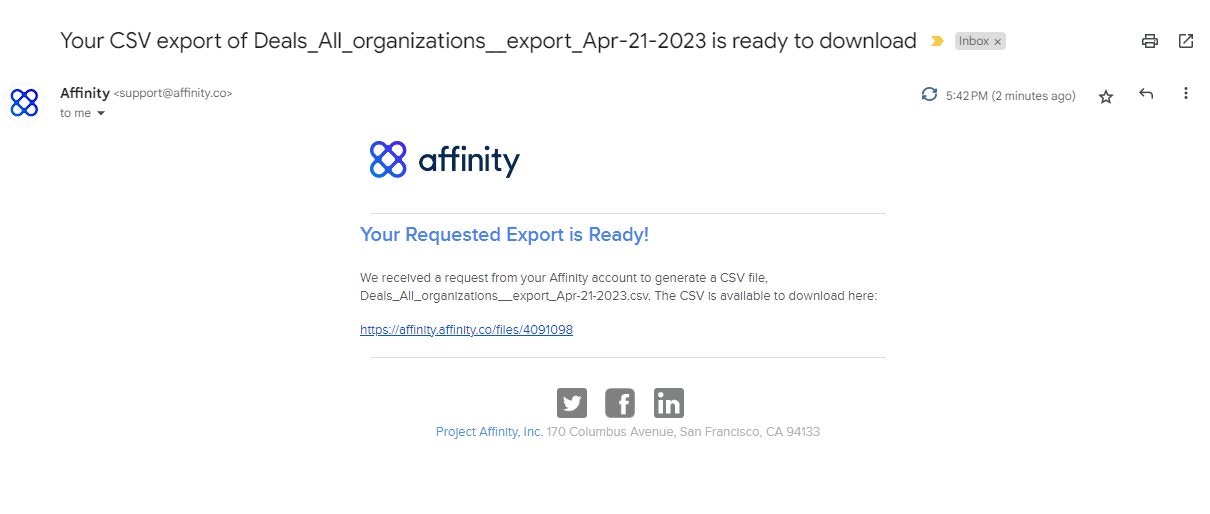
- Click the Export button, then click Export view as CSV, which will send you an email with a link to download the CSV file.
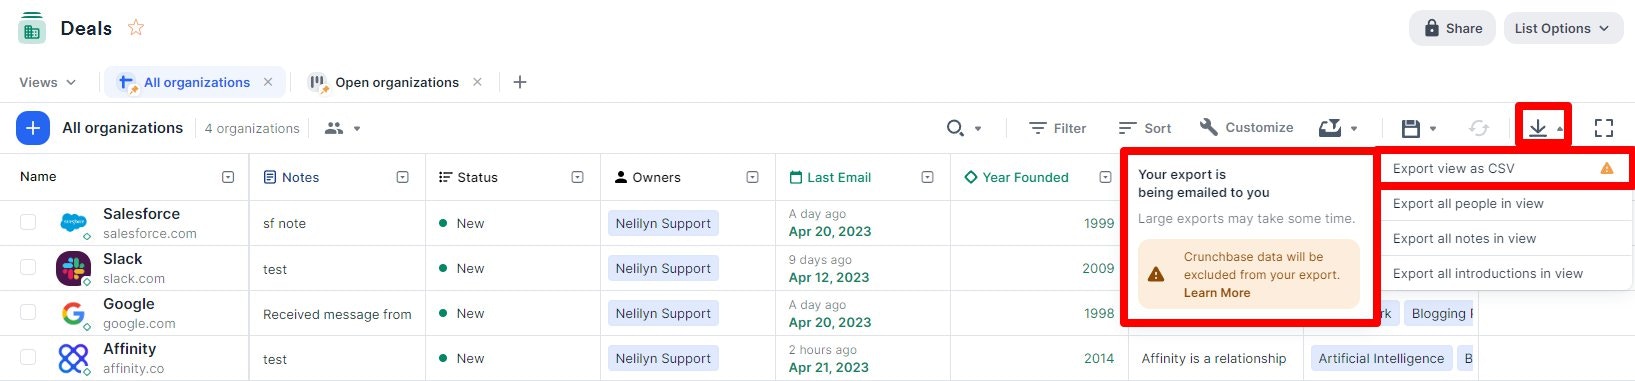
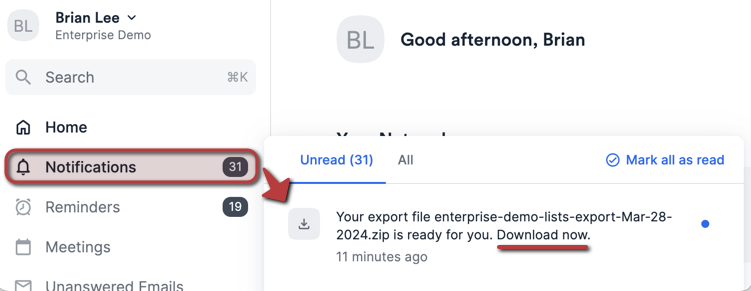
- You can also click the Notifications tab, where you will receive a notification to download the CSV file.

- If needed, you can always go back to previous emails for previous exports and click the download link within the email that has been sent to your primary email address. Note: The Connections column will not export any data at the moment.
How to export all lists (Enterprise Admins only)
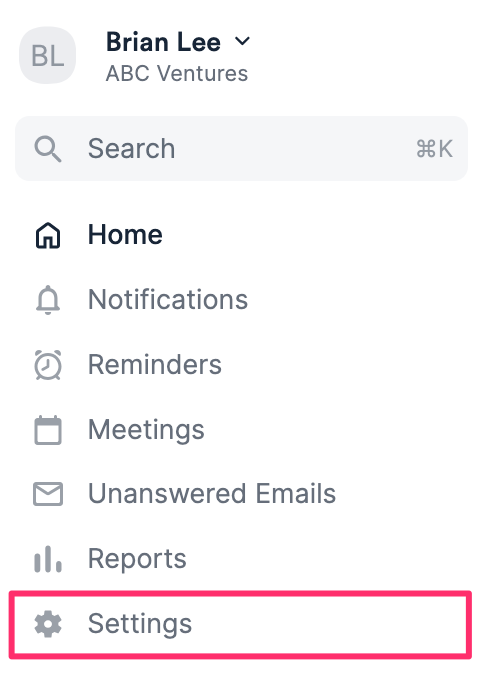
Please note that this feature is only available for Enterprise Admins on the Enterprise tier.- If you are an Enterprise Admin, click on Settings on the global navigation bar on the left side of your screen.
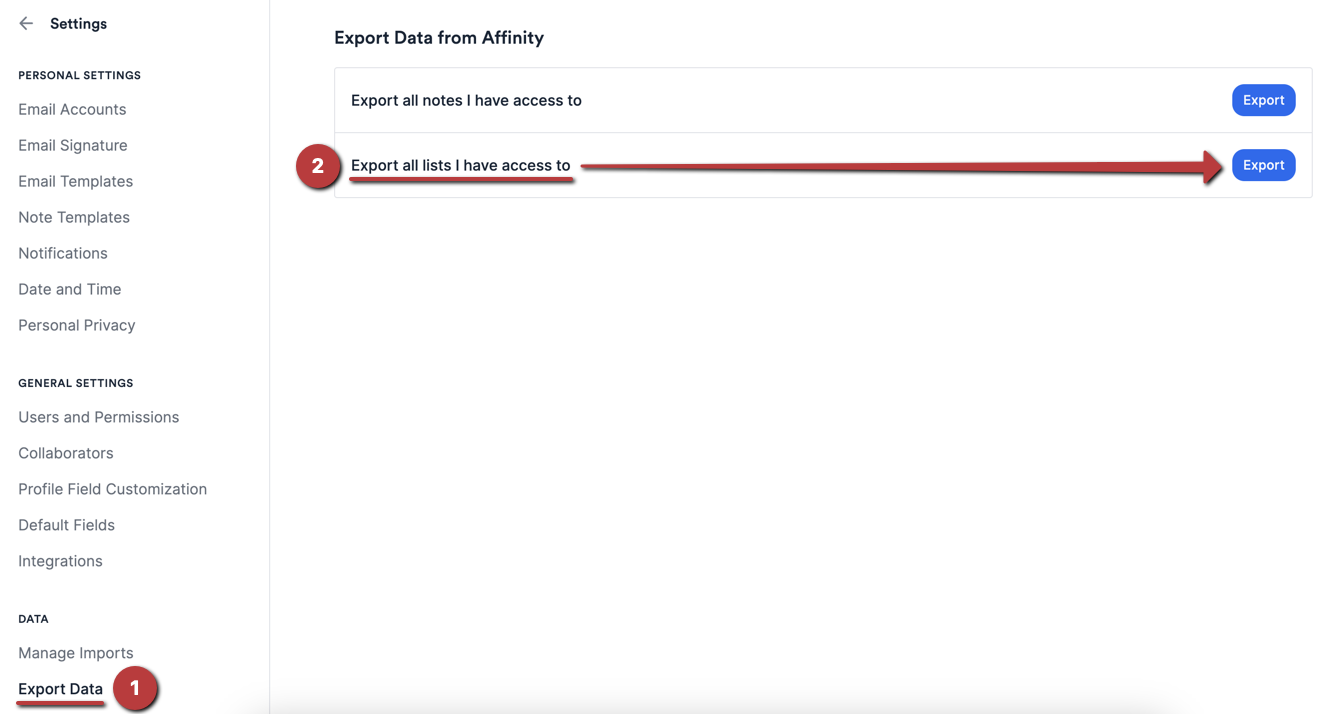
- Click the Export Data tab, then click Export for the second option: Export all lists I have access to.
- Given that downloading all of the lists will contain a plethora of data, Affinity will only export certain columns for each list based on the list type.
People lists Organization lists Opportunity lists Affinity Row ID Affinity Row ID Affinity Row ID Person ID Organization ID Opportunity ID Full Name Organization Name Opportunity Name First Name Website Close Date Last Name Date Added Date Added Email Addresses Amount Amount Primary Email Owners Owners Date Added Status Status Amount Time in Current Status Time in Current Status Owners People People Status Organizations Time in Current Status Organizations - Note: These are the columns that will be exported for every list. Additional columns may be included in exports of certain lists based on whether they are default columns from Affinity’s list templates.
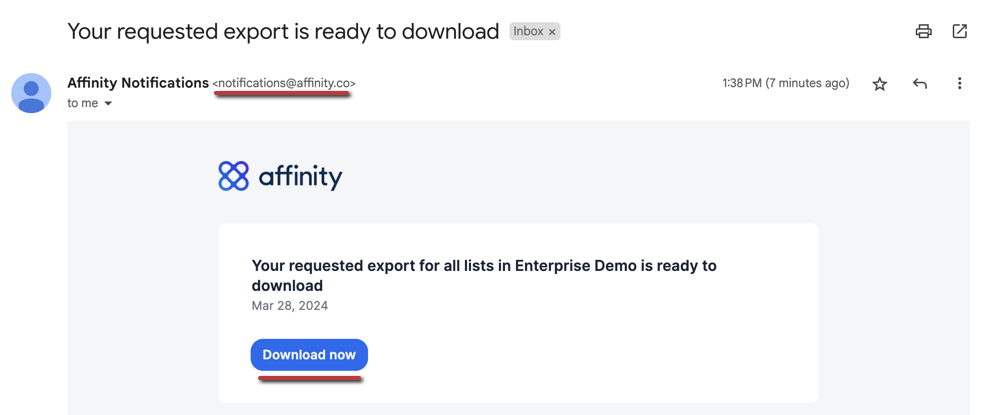
- Once the export is complete, you should receive a web-app notification where you can download the ZIP file. Opening the ZIP file will show multiple CSV files - one CSV file for each list.
- Otherwise, you can go to your email inbox and click the Download now button to download the ZIP file from there - just make sure that it’s coming from notifications@affinity.co.
Troubleshooting common issues
Here are some reasons why you may not be receiving an email about your export:- You are exporting a very large set of data (thousands of rows and several columns). It may take some time depending on the amount of data being exported - if you still don’t receive an email, feel free to reach out to us at support@affinity.co.
- You may have already received it in another email account you’re syncing into Affinity. Please check your inboxes in your other email accounts.
Important Callouts
- If you don’t see the Export button or the Export option within a list, it is most likely because you are on the Enterprise tier and your Enterprise Admin has disabled exporting options for your account role.
- Per our contract with Crunchbase, Crunchbase fields will not be included in the exports, even if they are showing in the saved view that you exported from (see Crunchbase data in Affinity).
- You can export the equivalent Affinity Data fields instead.