How-to — task-oriented recipe.
How to manually upload files
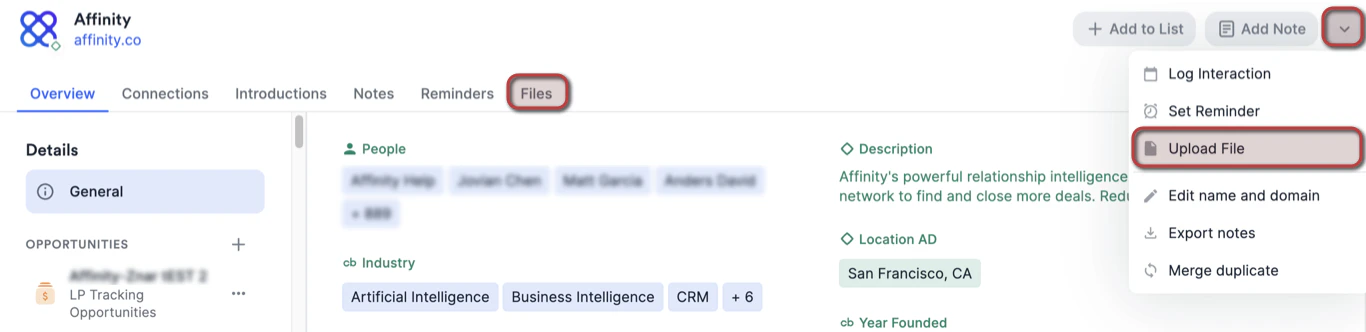
- Click into a contact’s profile page, then click on the dropdown icon at the top-right corner. Select Upload File to drag-and-drop your file or browse for files from your computer.
-
You can also click Files to see already-uploaded files or upload already-scanned files that Affinity found in your email threads.
- If you upload a file to a person’s profile page, it will not carry over to the organizations or opportunities that the person is associated with. You must go to the associated organizations’ and opportunities’ profile pages to upload the files there as well if needed.
How to auto-upload files
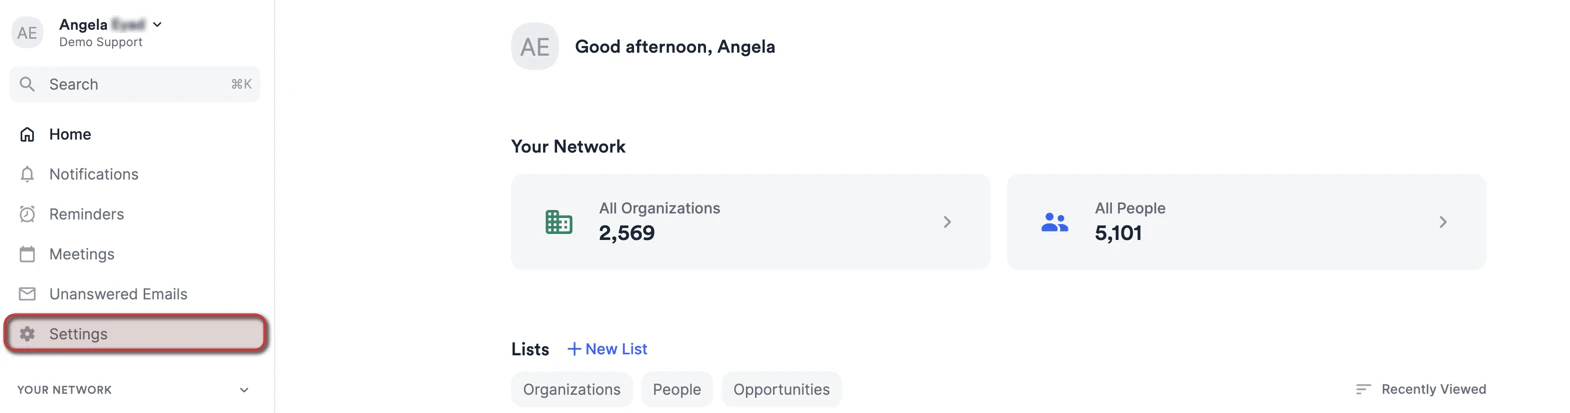
- Click on Settings on the left side panel.
- Click the Email Accounts tab on the left sidebar and see the Automatic File Upload section.
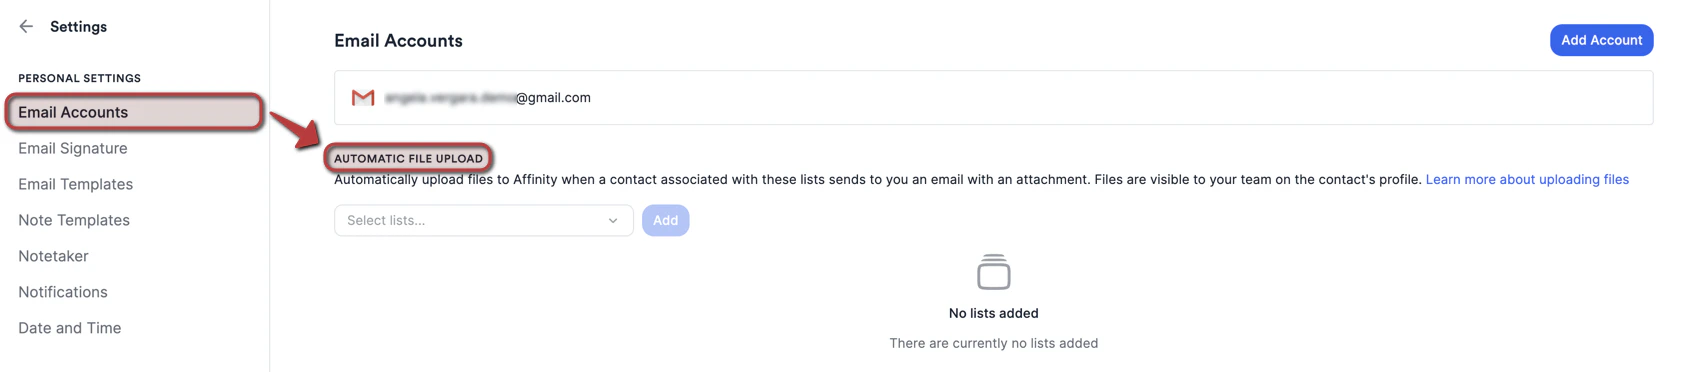
- Add the list(s) that you approve of for automatic file uploads, then click Save on the top-right corner. Now, any email interactions you have with people on these approved lists will have the attached files auto-uploaded to their respective profile pages.
- Note: If you add organization lists for auto-uploads, only the files associated with people’s email address that match their organization’s domain will get auto-uploaded to their respective organization’s profile page.
- Auto-uploading files is not retroactive and will only apply to your own interactions that have files attached - it will not apply to your team members’ interactions. If your team members would like to auto-upload files as well, they will have to go to their own Privacy Settings and set it up themselves.
- Don’t see files being scanned in the “Found in your email” section or being automatically uploaded? Check to see if these file types are supported within the second section of this article: Supported File Types for Upload.
- Last but not least, if you’re on the Enterprise tier and have Enterprise Permissions enabled, the Enterprise Admin of your account will determine how automatically uploaded files get shared - either with Everyone or Yourself.
How to download or remove already-uploaded files
- Go to the contact’s profile page.
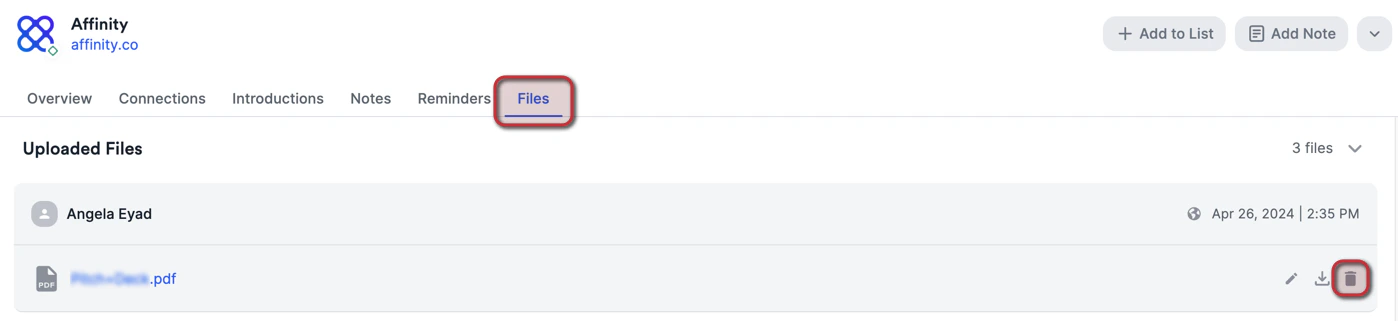
- Click the Files tab to see all files that were uploaded.
- To download a file, click the Download icon next to the relevant file.
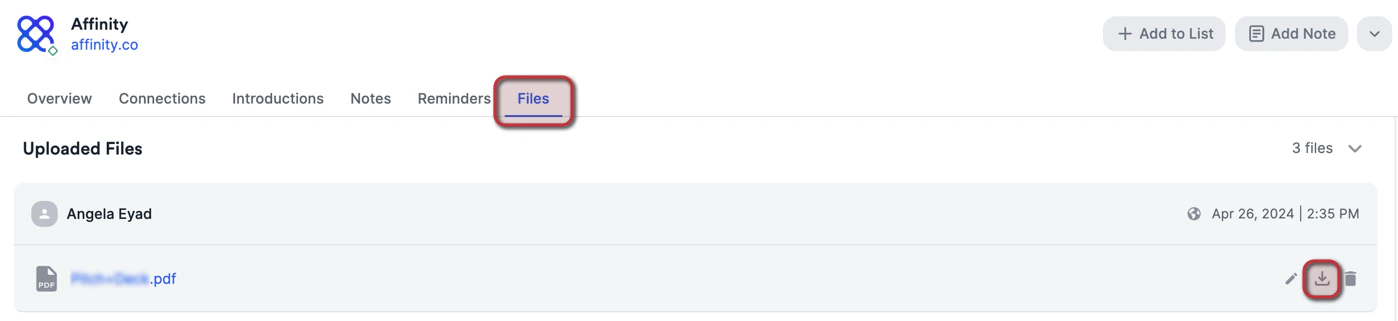
- To remove a file from the profile page, click the Trash icon next to the relevant file.
Troubleshooting
Running into errors when attempting to upload files? This can result from the following:- The original email has been moved, deleted, or archived.
- The email inbox that the attachment was associated with has been migrated.
- The file can still be uploaded manually by downloading and uploading the attachment.
Important Callouts
Manual File Uploads
- Manually uploaded files only apply to the specific entity where you upload them, not to any associated entities:
- Uploading a file to a person’s profile page will not carry over to the organizations or opportunities that the person is associated with.
- Uploading a file to an organization’s profile page will not carry over to the people or opportunities that the organization is associated with.
- Uploading a file to an opportunity’s profile page will not carry over to the people or organizations that the opportunity is associated with.
- To make a file available on multiple associated entities, you must upload it separately to each profile page.
Automatic File Uploads
- When you configure auto-upload for lists, files can flow to associated organizations and opportunities based on the person’s email address used in the email interaction: For Organization lists:
- Files from emails where a person uses their company email domain will auto-upload to that organization’s profile page
- Files are uploaded based on the email domain match, not to the person’s profile itself
- Example: If you’re emailing Jane Doe (jane.doe@company123.com) from Company 123 (company123.com), files from that email thread will auto-upload to Company 123’s profile page. However, if Jane uses a personal email (jane.doe@gmail.com), those files will not auto-upload to Company 123’s profile page. For Opportunity lists:
- Files sent to or received from people associated with opportunities will auto-upload to those opportunity profile pages
- Files are uploaded based on the email interaction with associated people, not to the person’s profile itself
- Auto-uploaded files use the person’s email address as the connection point to determine which organization or opportunity profile receives the file
- The file does not get uploaded to the person’s own profile during this process
- Manual uploads remain isolated to the specific profile where you upload them