> ## Documentation Index
> Fetch the complete documentation index at: https://support.affinity.co/llms.txt
> Use this file to discover all available pages before exploring further.
# How To Set Up Ping OpenID For Affinity Access
> Help center reference: How To Set Up Ping OpenID For Affinity Access
**How-to** — task-oriented recipe.
Set up a custom application within Ping for authentication into Affinity.
* **Note:** Custom SSO is only available for those on our **Enterprise** tier.
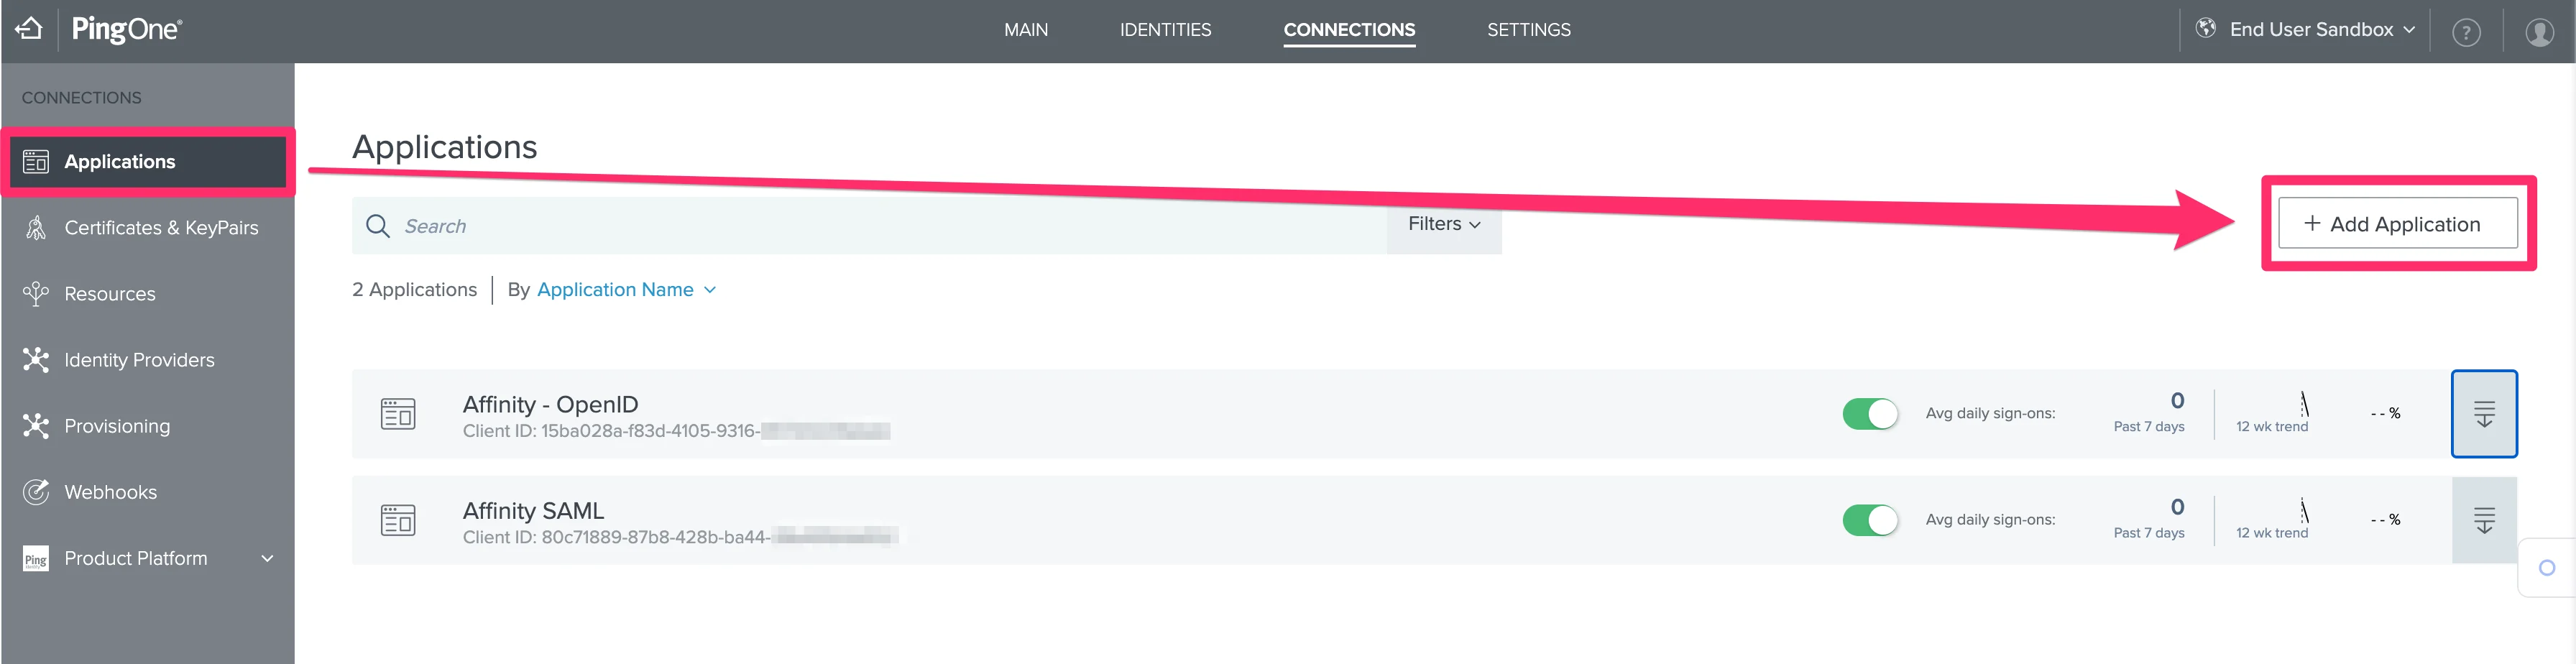
1. Click **Applications** on the left side, then click the **+ Add Application** button on the right.
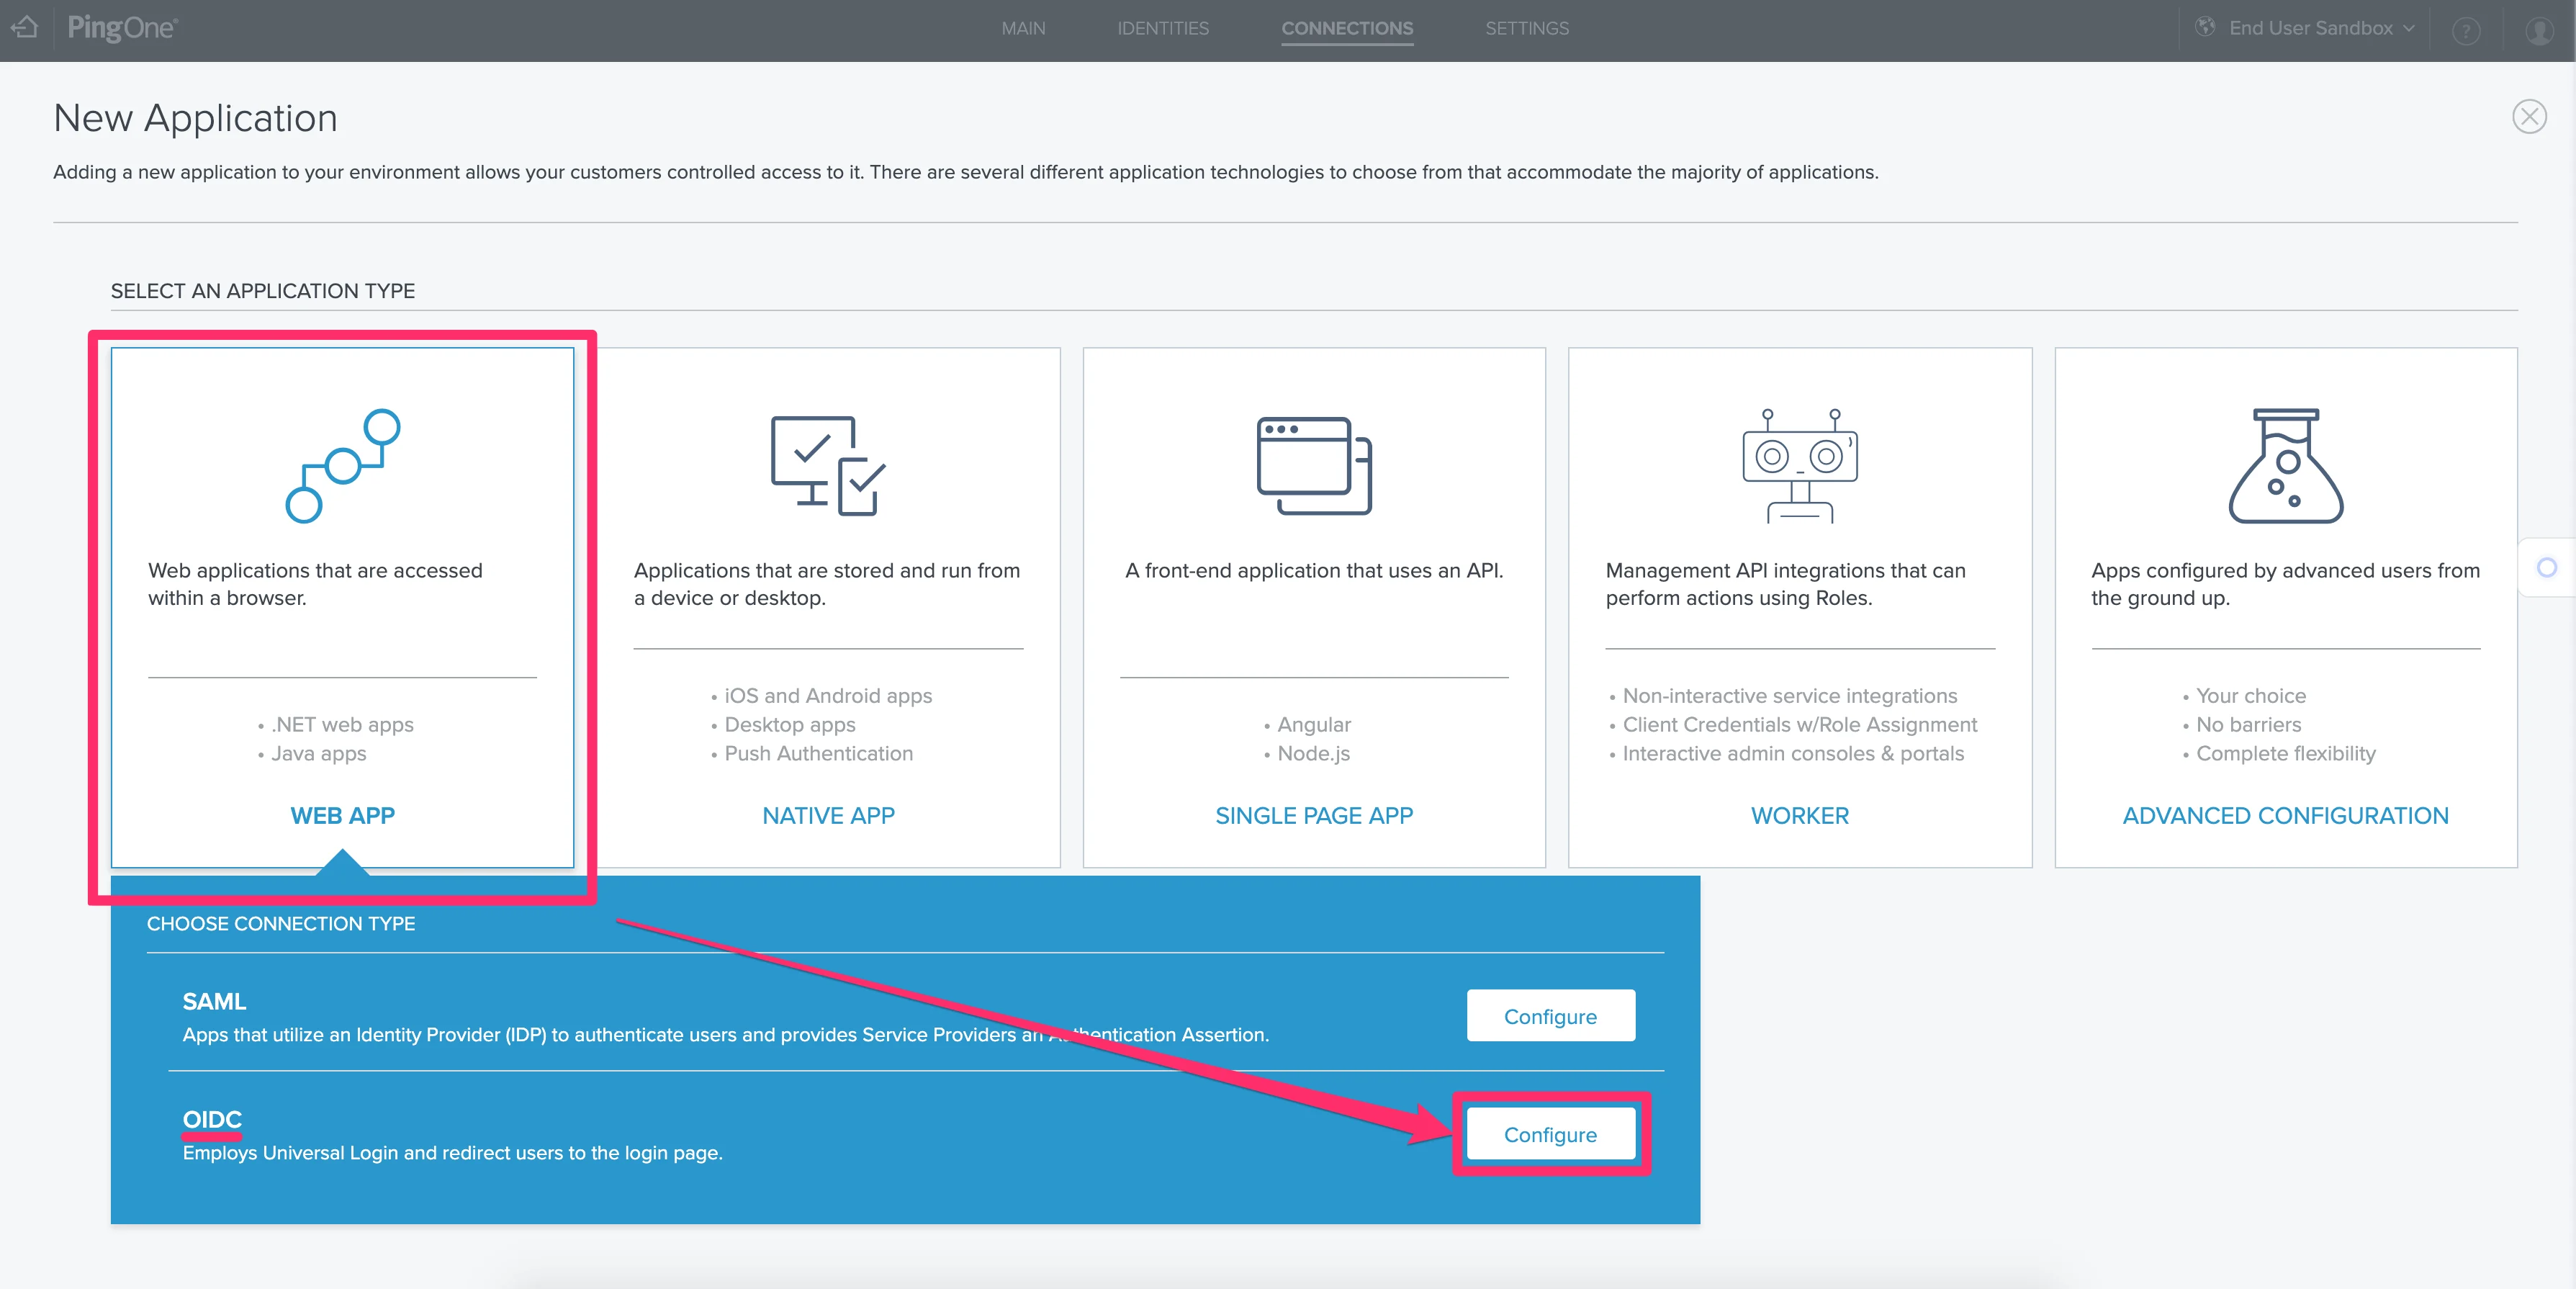
 2. Then, select **Web App** and click **Configure** next to the OIDC option.
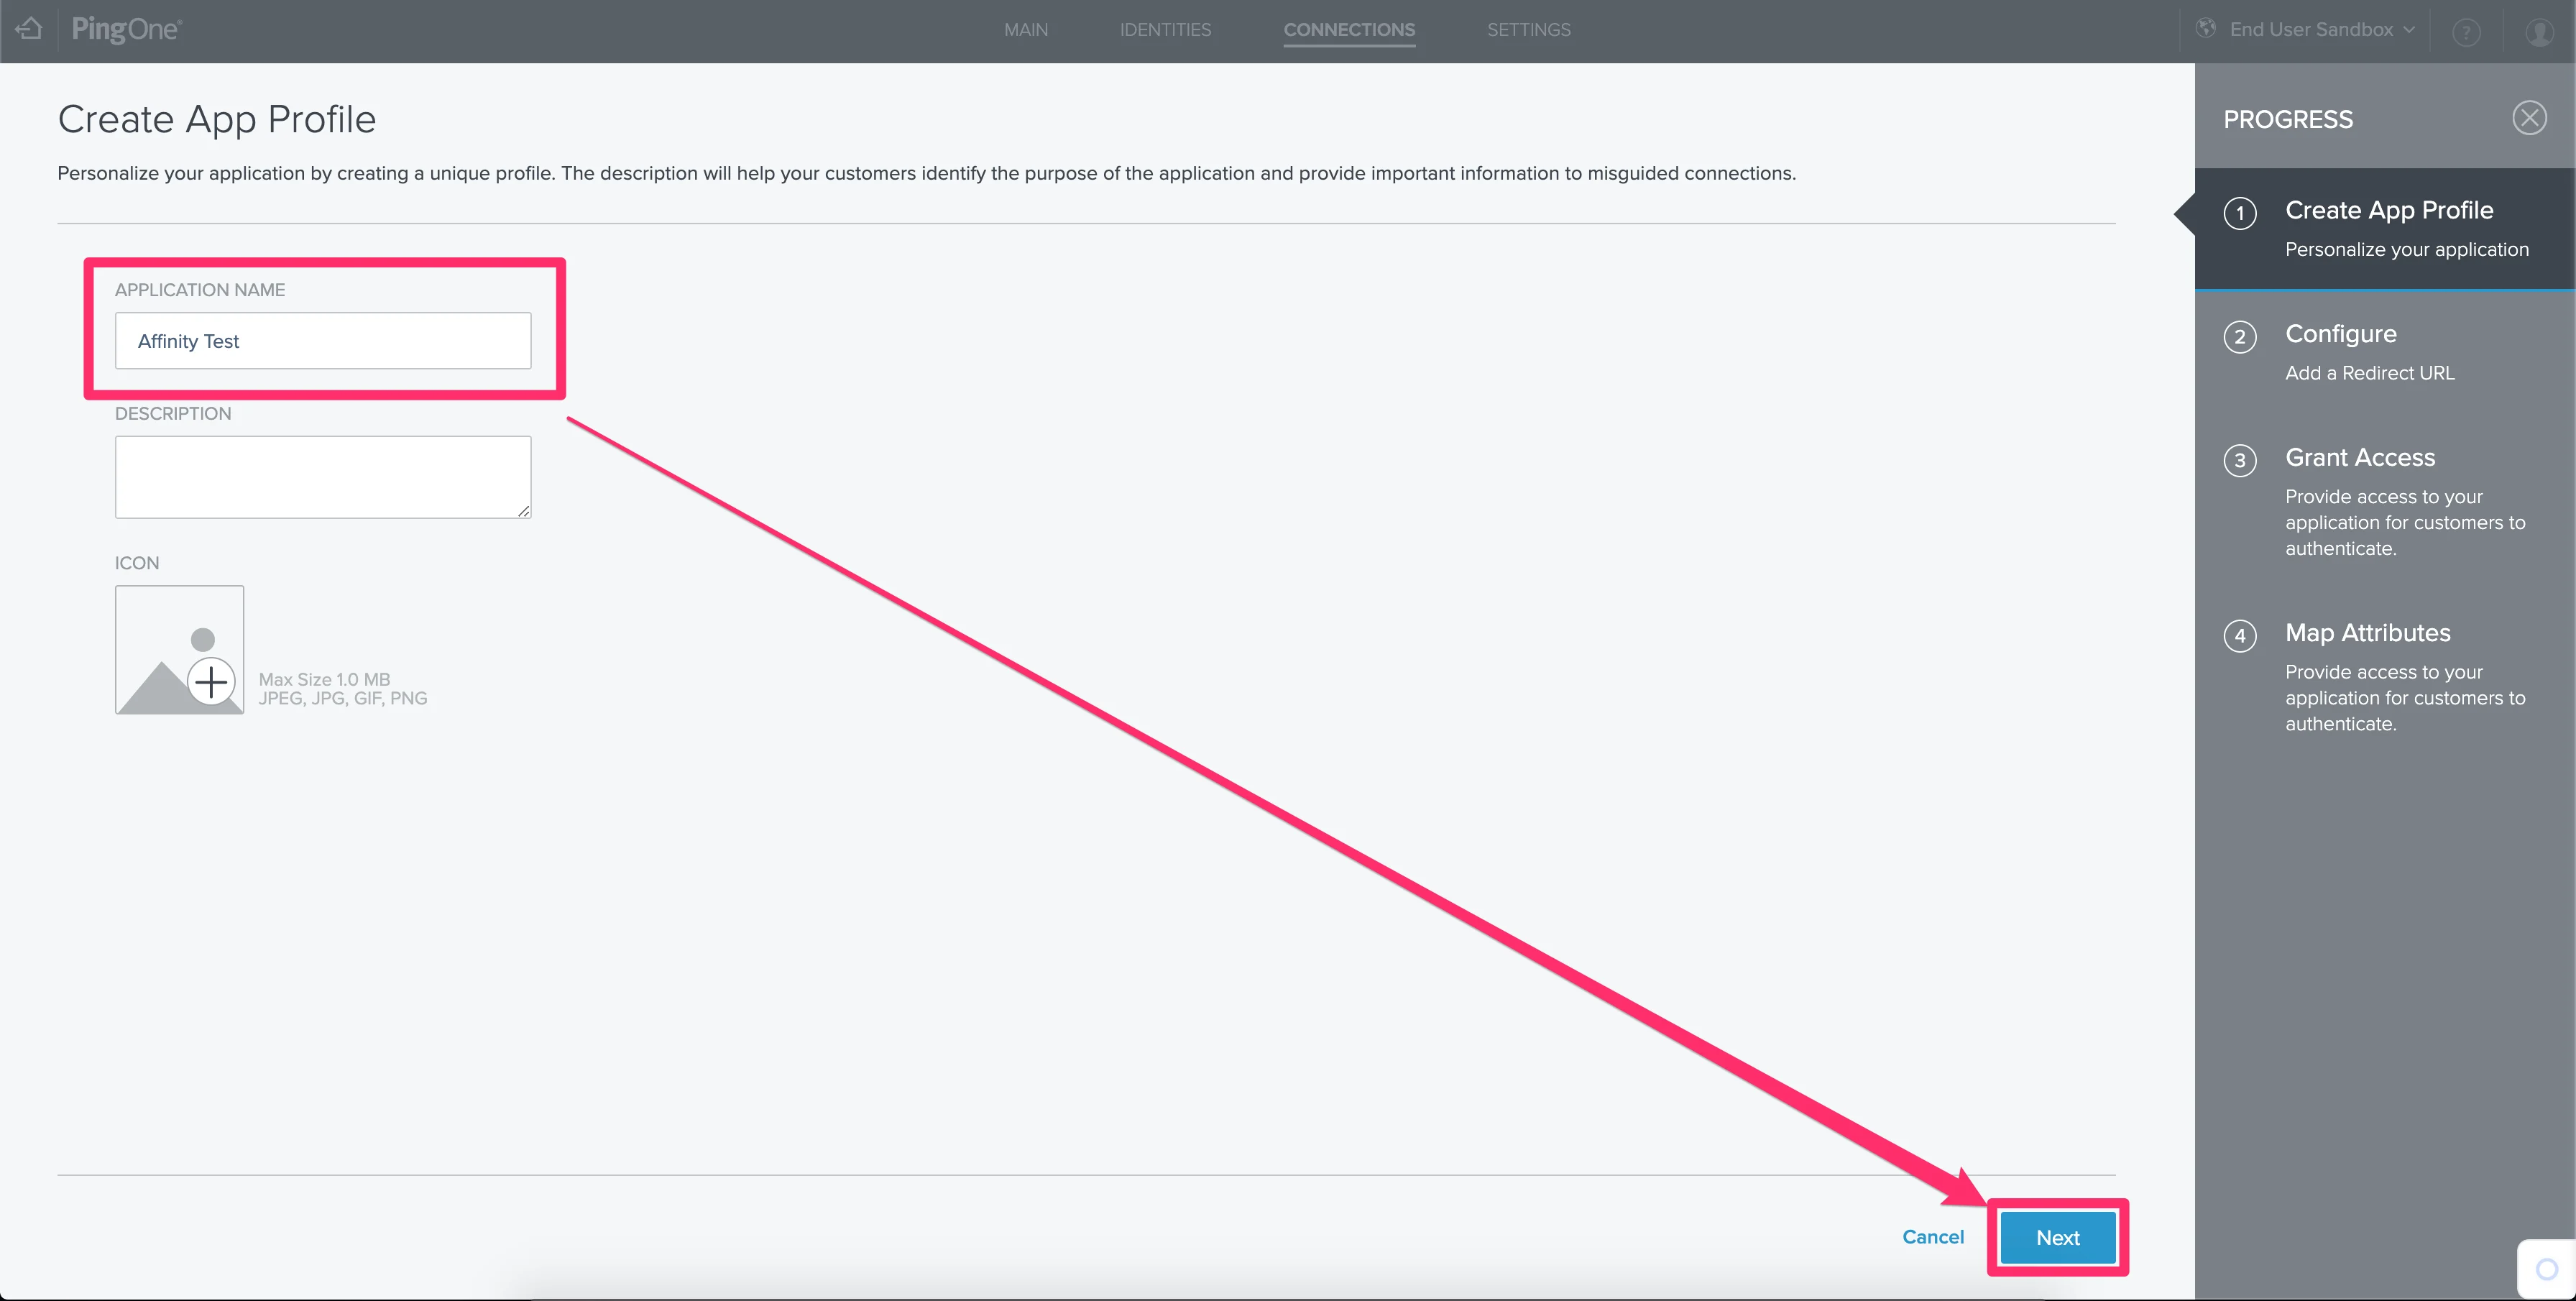
 3. On the next screen, add the **Application Name**. The rest of the fields are optional.
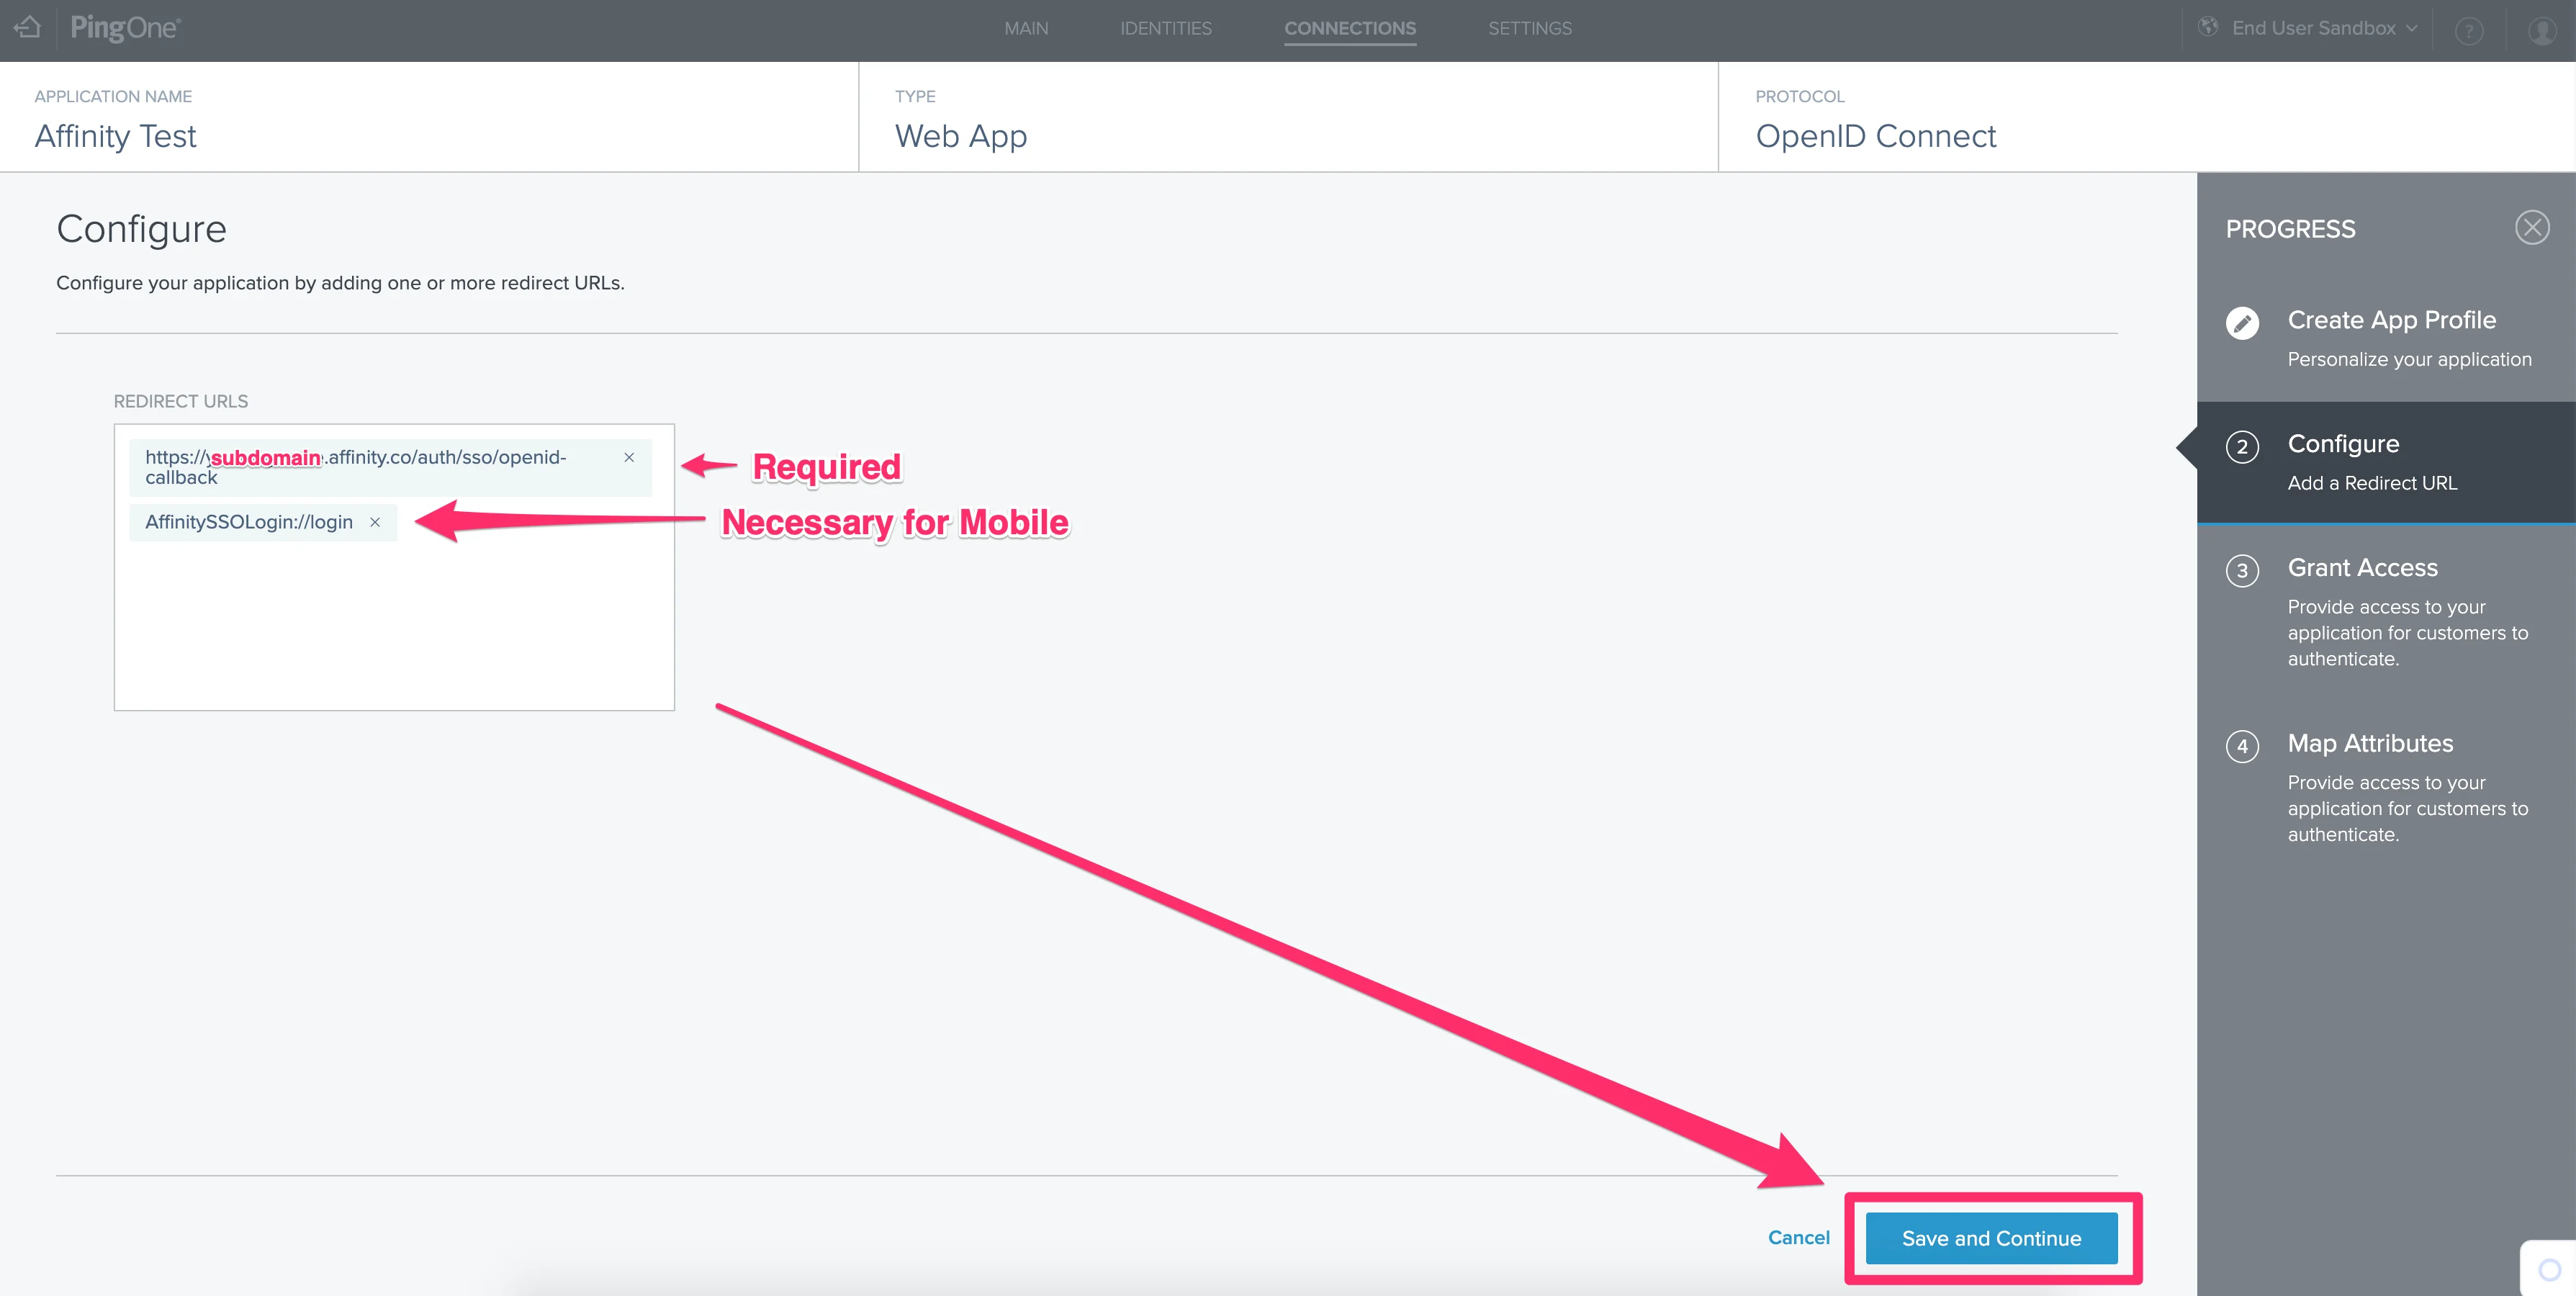
 4. On the next page, please fill out the appropriate redirect URLs. If you're not sure what your Affinity subdomain is, check out the following article: [How to find your Affinity subdomain](/s/article/How-to-find-your-Affinity-subdomain)
1. Required: `https://[subdomain].affinity.co/auth/sso/openid-callback`
2. For Affinity's Mobile App: `AffinitySSOLogin://login`
4. On the next page, please fill out the appropriate redirect URLs. If you're not sure what your Affinity subdomain is, check out the following article: [How to find your Affinity subdomain](/s/article/How-to-find-your-Affinity-subdomain)
1. Required: `https://[subdomain].affinity.co/auth/sso/openid-callback`
2. For Affinity's Mobile App: `AffinitySSOLogin://login`
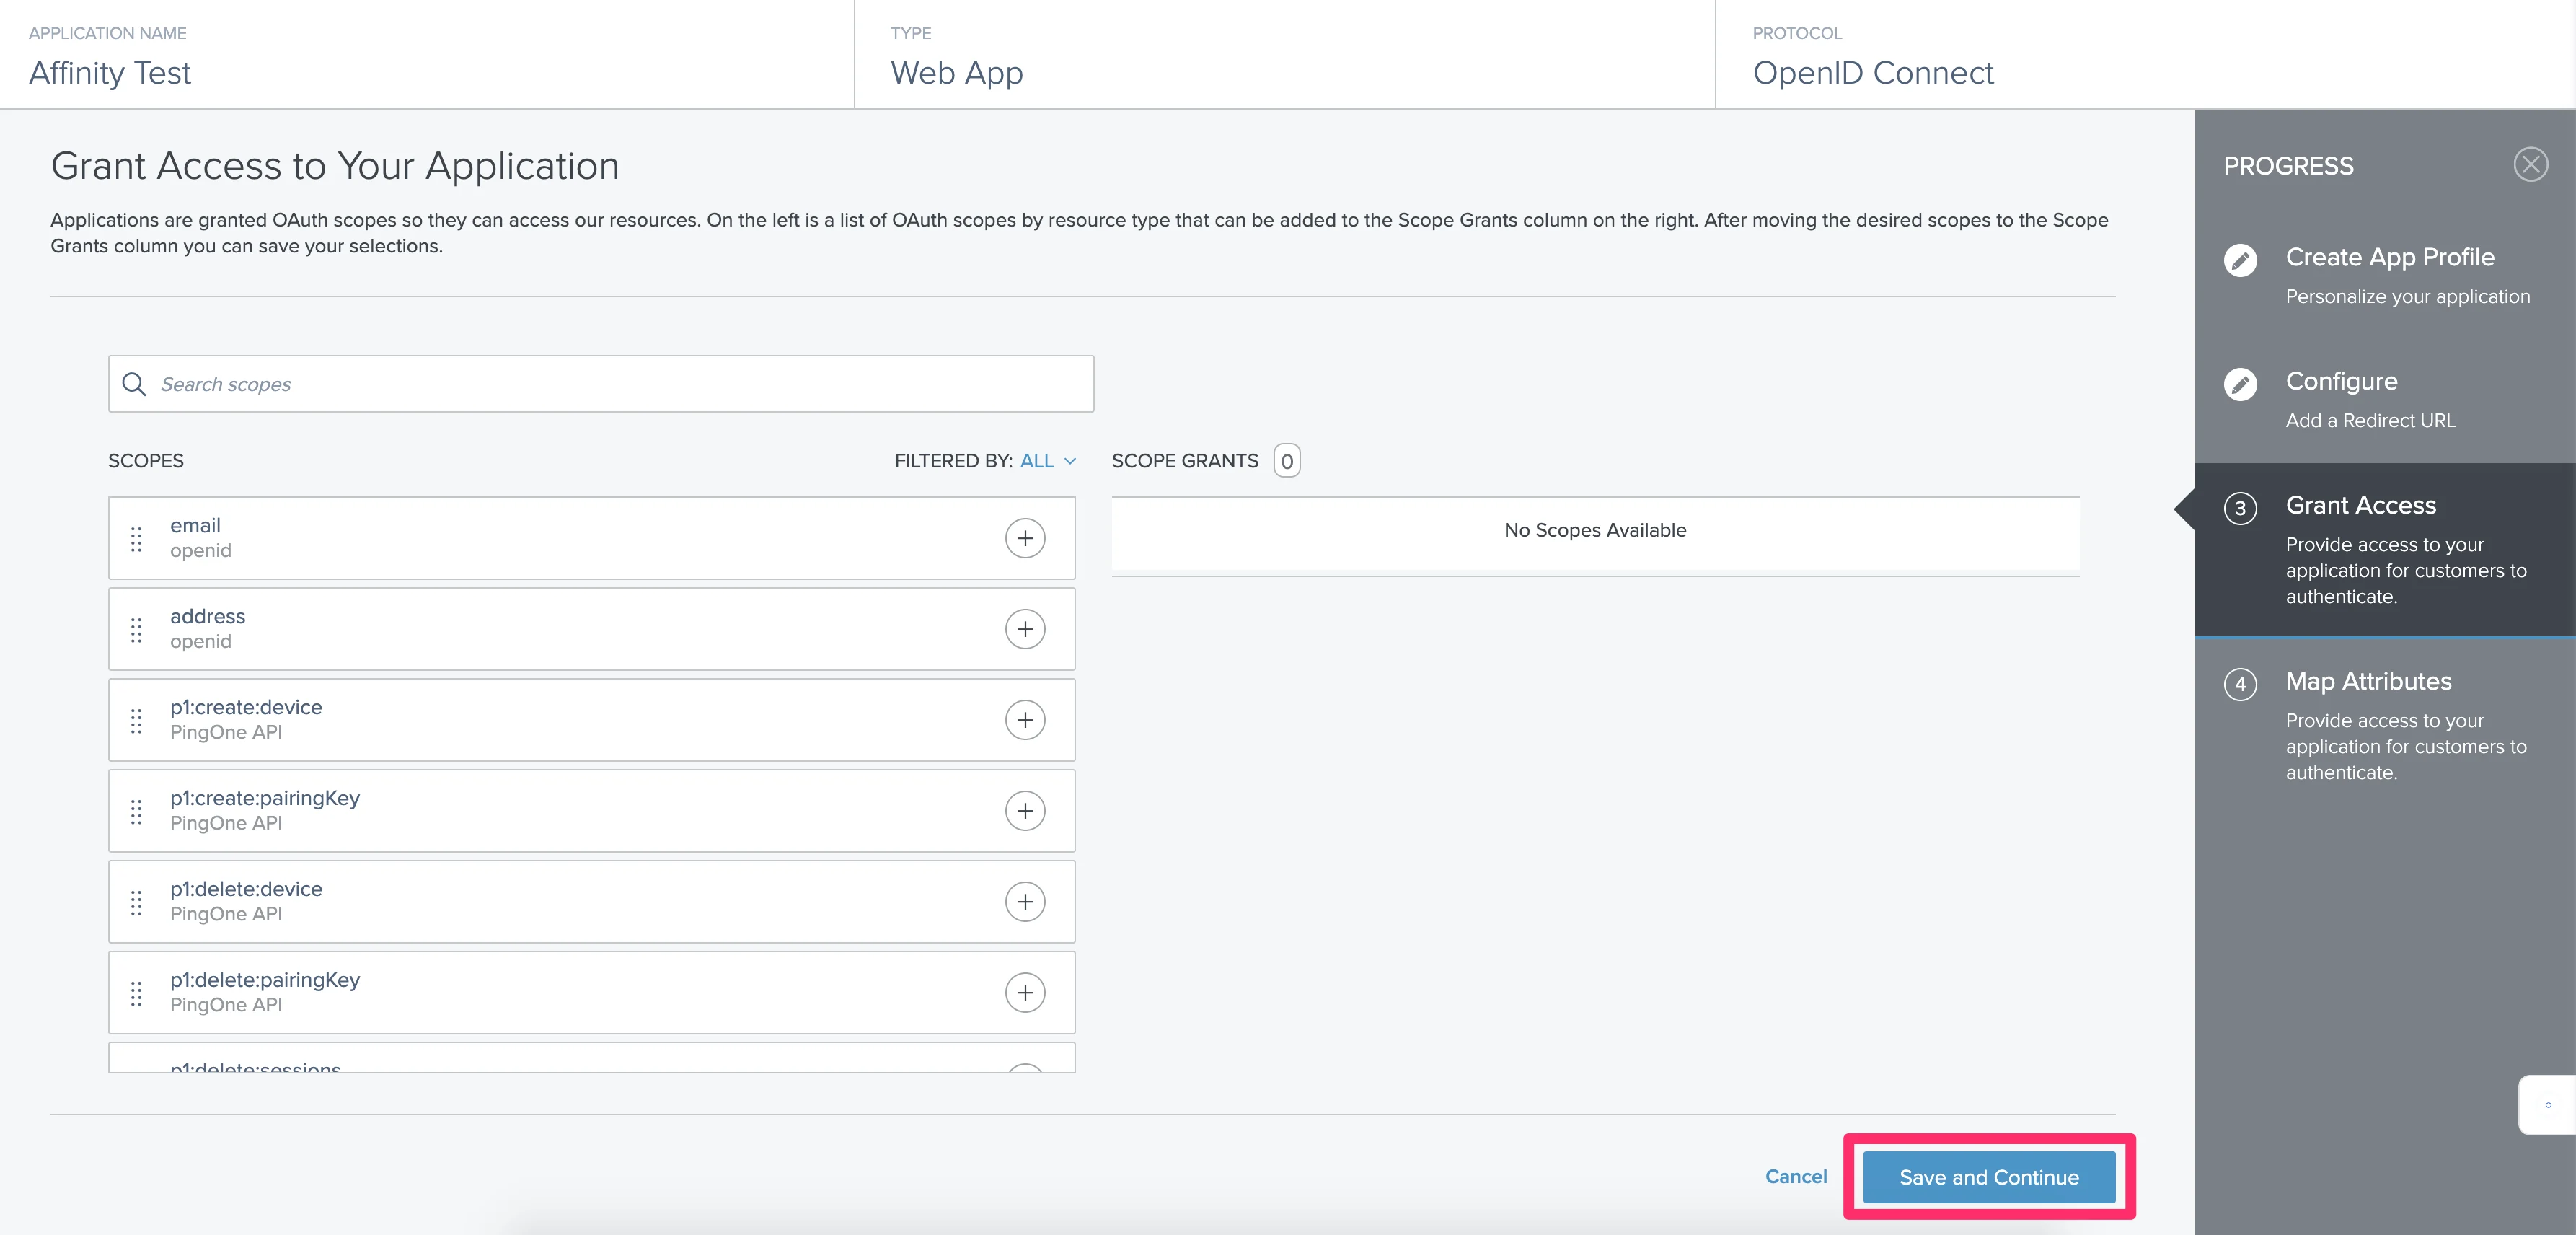
 5. No additional scopes are required in the section titled **Grant Access to Your Application**. Feel free to leave everything as is and click **Save and Continue**.
 6. Under **ODIC ATTRIBUTES**, please do the following:
1. Click **+ ADD ATTRIBUTE** and select "Email Address" for the **PINGONE USER ATTRIBUTE** field.
2. Make sure to type in "email" for the **APPLICATION ATTRIBUTE** field.
3. Make sure to click the checkbox to make it **Required**.
4. Finally, click **Save and Close**.
6. Under **ODIC ATTRIBUTES**, please do the following:
1. Click **+ ADD ATTRIBUTE** and select "Email Address" for the **PINGONE USER ATTRIBUTE** field.
2. Make sure to type in "email" for the **APPLICATION ATTRIBUTE** field.
3. Make sure to click the checkbox to make it **Required**.
4. Finally, click **Save and Close**.
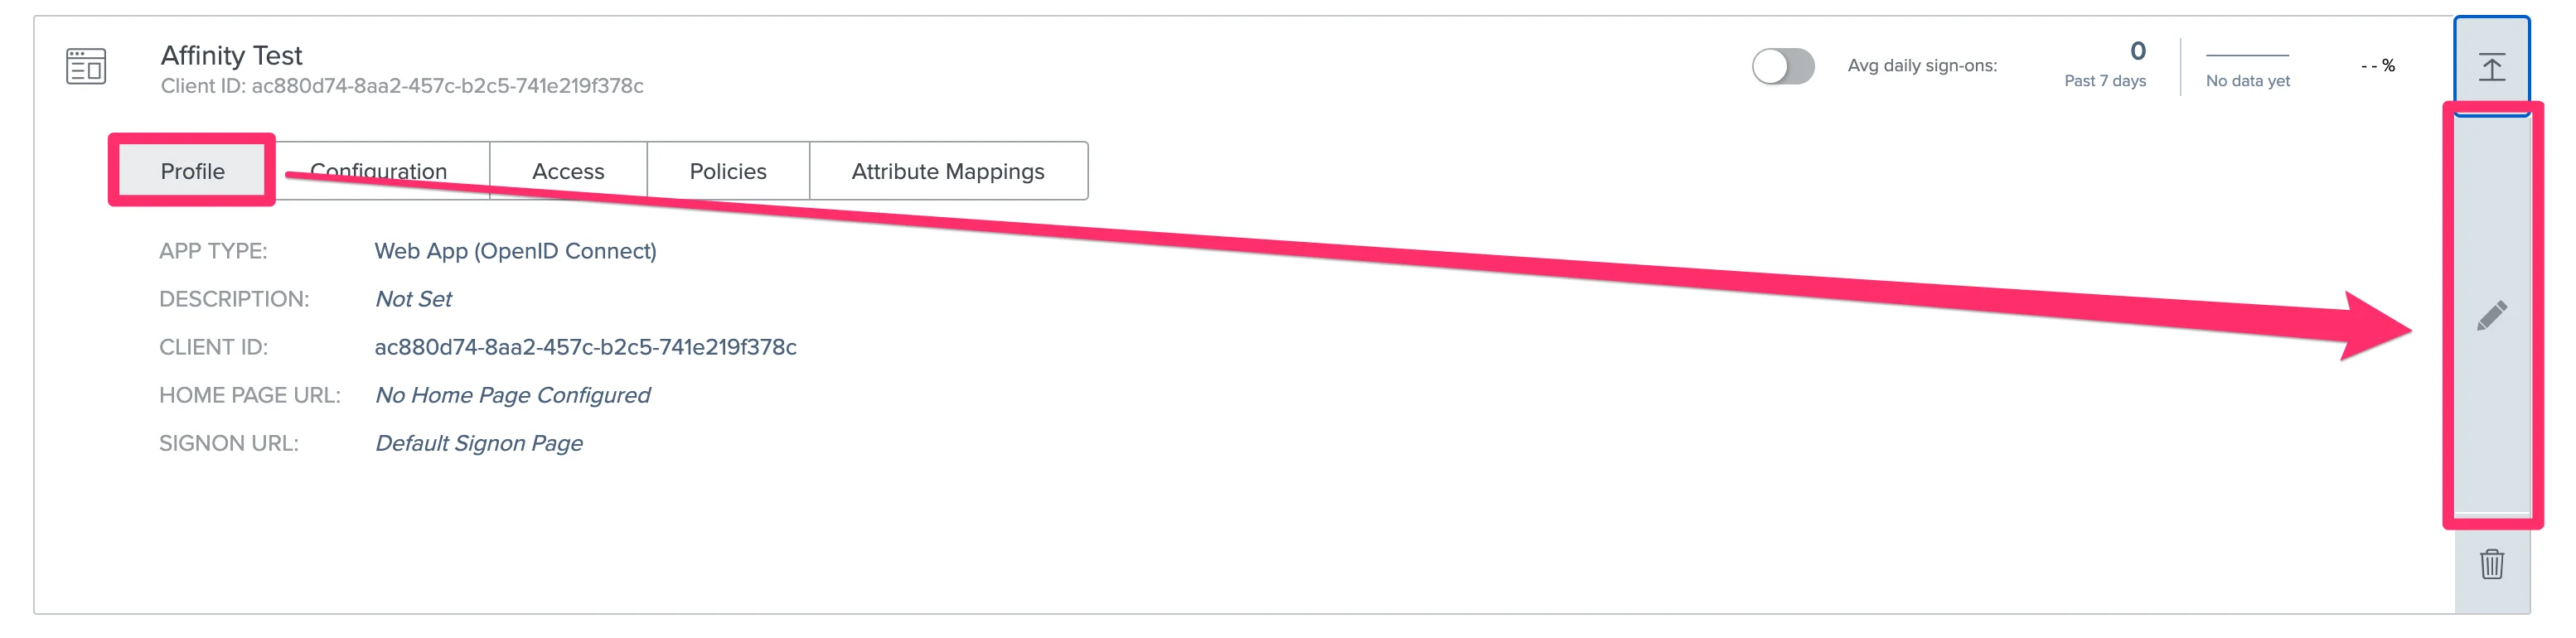
 7. Now, click the **Edit** icon to the right.
 8. Click on the **Configuration** tab, then change the **TOKEN ENDPOINT AUTHENTICATION METHOD** to **Client Secret Post**. Finally, click **Save and Close**.
 9. Now that we're finished with the set up, please send over the following details to [support@affinity.co](mailto:support@affinity.co) and mention that you're setting up Ping (OpenID):
* Client ID
* Client Secret
* OIDC Discovery Endpoint
9. Now that we're finished with the set up, please send over the following details to [support@affinity.co](mailto:support@affinity.co) and mention that you're setting up Ping (OpenID):
* Client ID
* Client Secret
* OIDC Discovery Endpoint