> ## Documentation Index
> Fetch the complete documentation index at: https://support.affinity.co/llms.txt
> Use this file to discover all available pages before exploring further.
# How To Install Affinity For Salesforce
> Help center reference
**How-to** — task-oriented recipe.
To begin, Affinity for Salesforce includes a managed package that provides components to visualize and leverage Affinity's relationship intelligence and data across your Salesforce accounts and contacts. Use this document as a basic guide on how to install and set up this package in your Salesforce account.
## Overview
1. Managed Package Details
2. How to install Affinity for Salesforce
3. How to configure the connected app
## Managed Package Details
The Affinity for Salesforce managed package contains Visualforce Pages that can be embedded in your Salesforce Account and Contact views. Each view will have a list of pages available:
* Connections
* Activity
* Notes The Managed Package also includes custom fields, a custom object, Apex triggers, a connected app, and a permission set to help get you started with the Affinity for Salesforce Chrome extension and data integrations. Continue reading below on how to install the managed package.
## How to install Affinity for Salesforce
1. If you have access to multiple Salesforce instances, sign out from them and sign into the Salesforce instance you'd like to install Affinity for Salesforce on.
2. There are a few Salesforce features that the Salesforce Admin must enable beforehand. See the following articles below to learn more:
1. Set up [**Enhanced Email**](https://help.salesforce.com/s/articleView?id=sf.enable_enhanced_email.htm\&type=5).
2. Set up [**Notes**](https://help.salesforce.com/s/articleView?id=sf.notes_admin_setup.htm\&type=5).
3. Set up [**Shared Activities**](https://help.salesforce.com/s/articleView?id=sf.activities_enable_shared_activities.htm\&type=5).
4. Make sure the [**Type**](https://help.salesforce.com/s/articleView?id=sf.users_fields_fls.htm\&type=5) field for the Task object is visible.
3. Install the most recent Affinity for Salesforce managed package in your production and/or sandbox Salesforce instance by following all the steps in this article: [How to install/update Affinity's Managed Package in Salesforce](/s/article/How-to-install-update-Affinity-s-Managed-Package-in-Salesforce)
## How to configure the connected app
Now that the managed package is installed, you must configure the connected app. This will allow Affinity to leverage user impersonation for Extensions users.
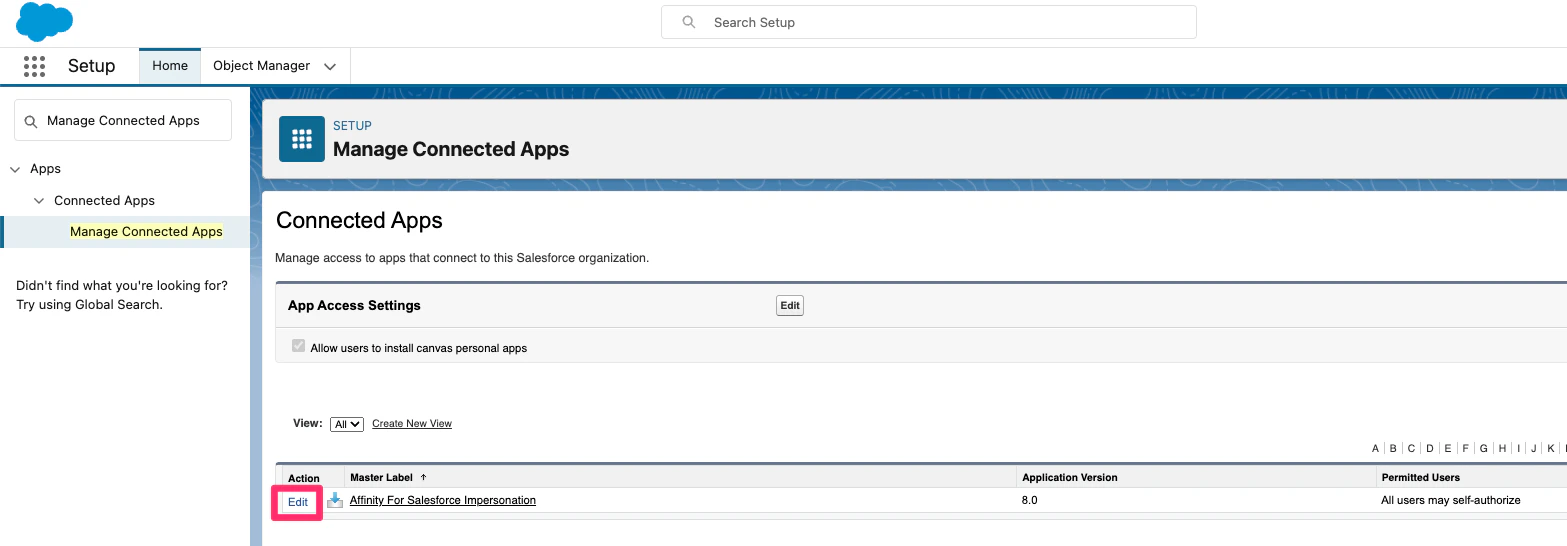
1. Go to **Setup** and search for **Manage Connected Apps**.
2. Click the **Edit** link next to the **Affinity For Salesforce Impersonation** connected app.
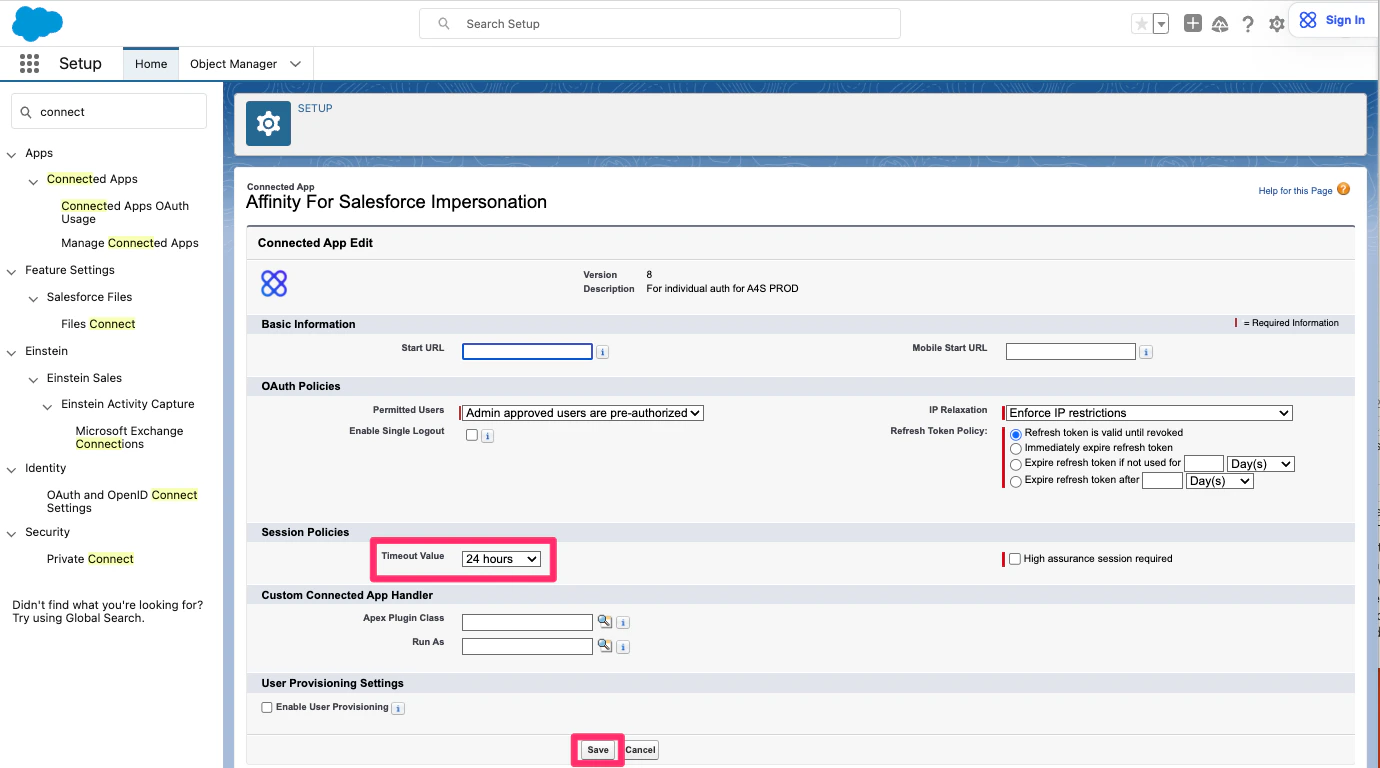
 3. Under OAuth Policies, update the **Permitted Users** field to: **Admin approved users are pre-authorized**.
4. Under Session Policies, update **Timeout Value** to **24 hours**. Then, click **Save**.
3. Under OAuth Policies, update the **Permitted Users** field to: **Admin approved users are pre-authorized**.
4. Under Session Policies, update **Timeout Value** to **24 hours**. Then, click **Save**.
 5. Configure the set of profiles that will have access to the connected app, which allows Affinity for Salesforce to use the Salesforce API on their behalf.
1. Click on **Manage Connected Apps** on the left side, then click **Affinity for Salesforce**.
2. Then, scroll down to the **Profiles** section of the page and click **Manage Profiles**.
3. Then, click the checkbox for the profiles that represent the set of users (e.g. Standard User, System Administrator) you want to allow to use Affinity for Salesforce.
4. Then, click **Save**.
5. Configure the set of profiles that will have access to the connected app, which allows Affinity for Salesforce to use the Salesforce API on their behalf.
1. Click on **Manage Connected Apps** on the left side, then click **Affinity for Salesforce**.
2. Then, scroll down to the **Profiles** section of the page and click **Manage Profiles**.
3. Then, click the checkbox for the profiles that represent the set of users (e.g. Standard User, System Administrator) you want to allow to use Affinity for Salesforce.
4. Then, click **Save**.
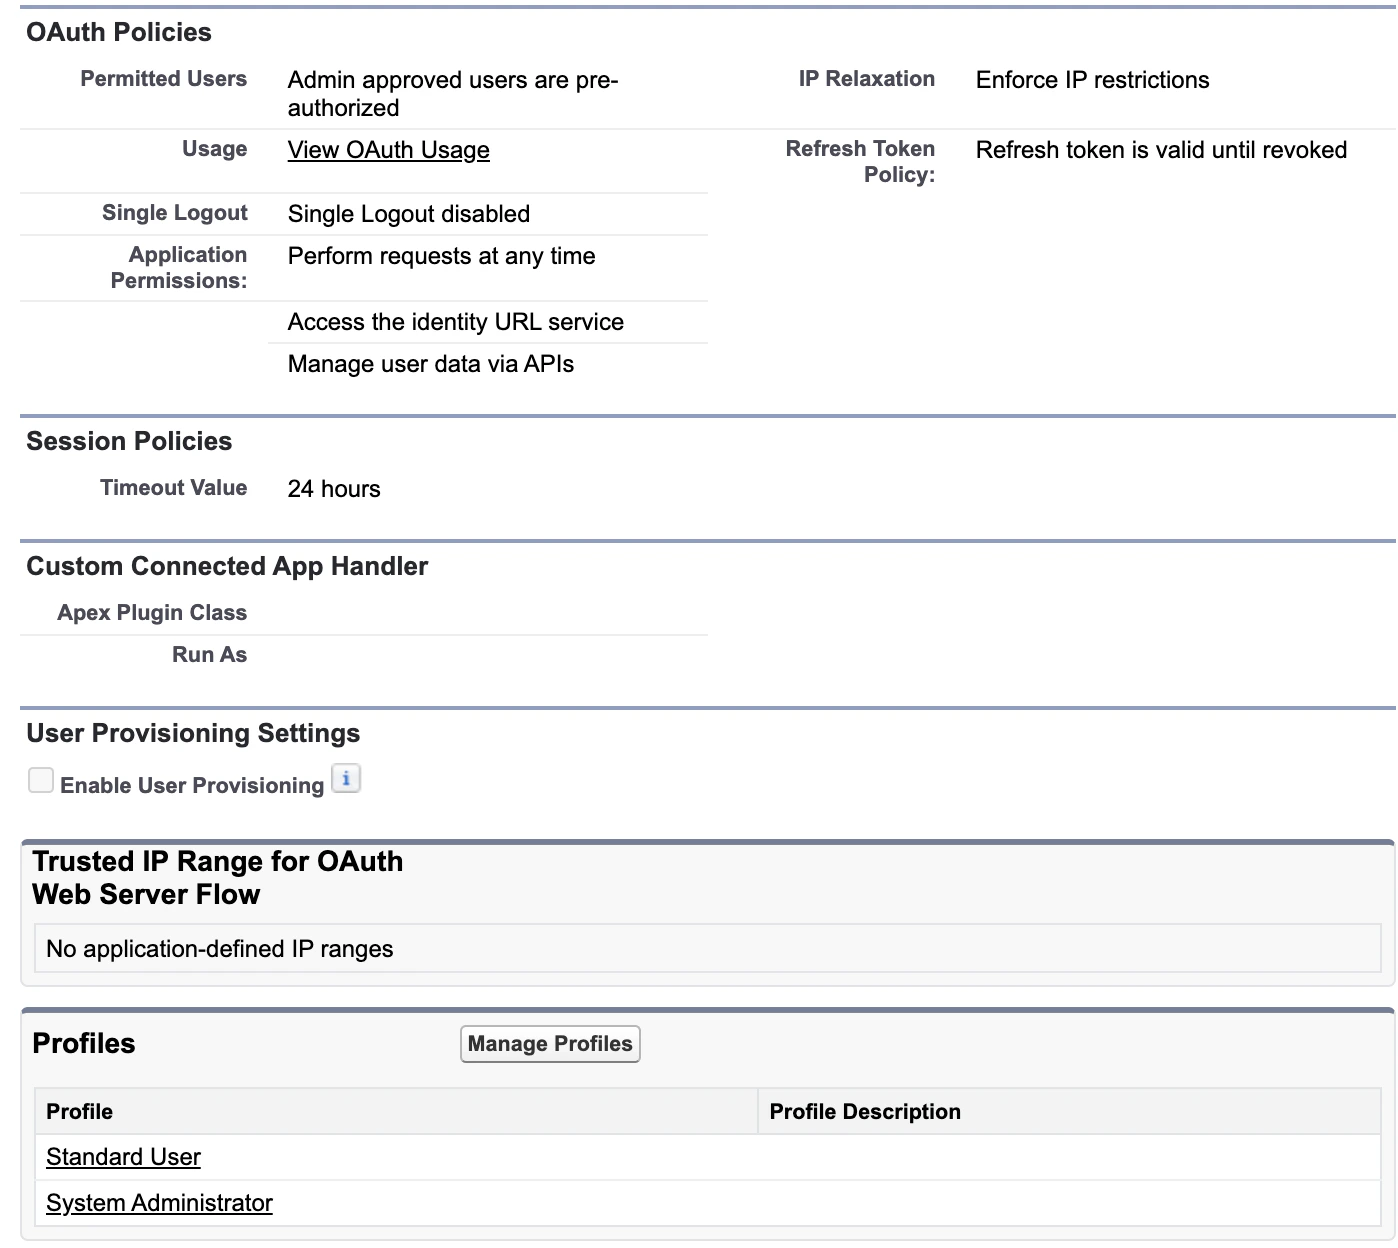
 6. Your Connected App view should look similar to the following below, but may vary in the **Profiles** section depending on which profiles you selected. Now that you're done with the installation process, let's move on to the set up process (see [How to set up Affinity for Salesforce](/s/article/How-to-set-up-Affinity-for-Salesforce)).