> ## Documentation Index
> Fetch the complete documentation index at: https://support.affinity.co/llms.txt
> Use this file to discover all available pages before exploring further.
# How to import your data into Affinity
> Help center reference: How to import data into Affinity
**How-to** — task-oriented recipe.
Given that your Excel/CSV files can have different formats, please make sure to clean up and properly format your data before starting the import process (see [Cleaning up your data before importing into Affinity](/s/article/Cleaning-up-your-data-before-importing-into-Affinity)). Once you do so, feel free to proceed with this video walkthrough:
**Note**: This video contains the old navigation bar on the top, whereas the current navigation bar now lies on the left side of your screen. While the remaining content is still the same, rest assured that we will be updating our videos accordingly.
## 1. Uploading your CSV file onto an Affinity list
1. Once you've [cleaned up your CSV file](/s/article/Cleaning-up-your-data-before-importing-into-Affinity), click into the list you plan to import into. For this example, we will import into an organization list.
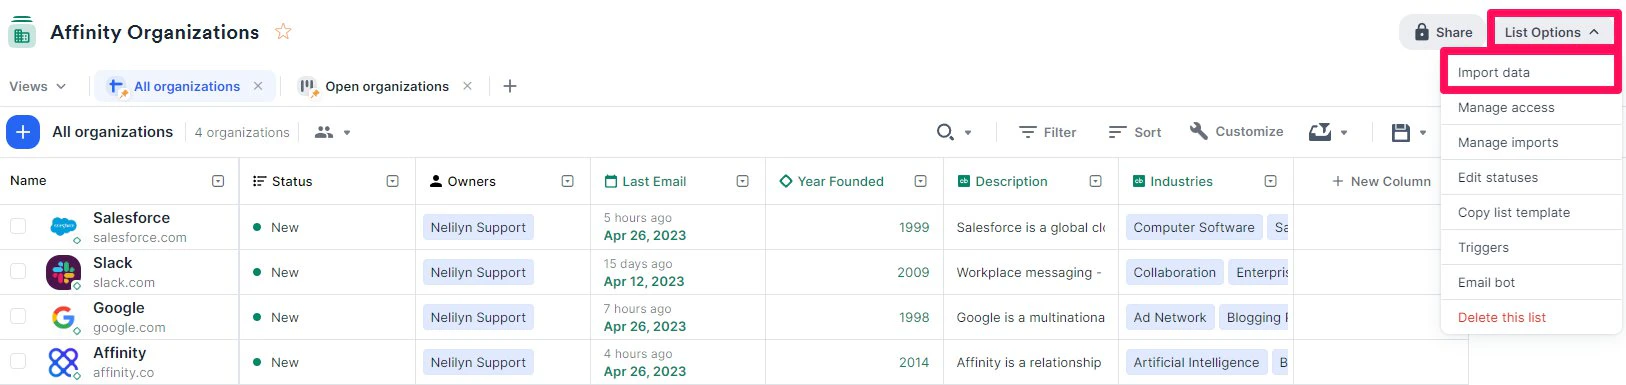
2. Click **List Options** on the top-right corner, then click **Import data**.
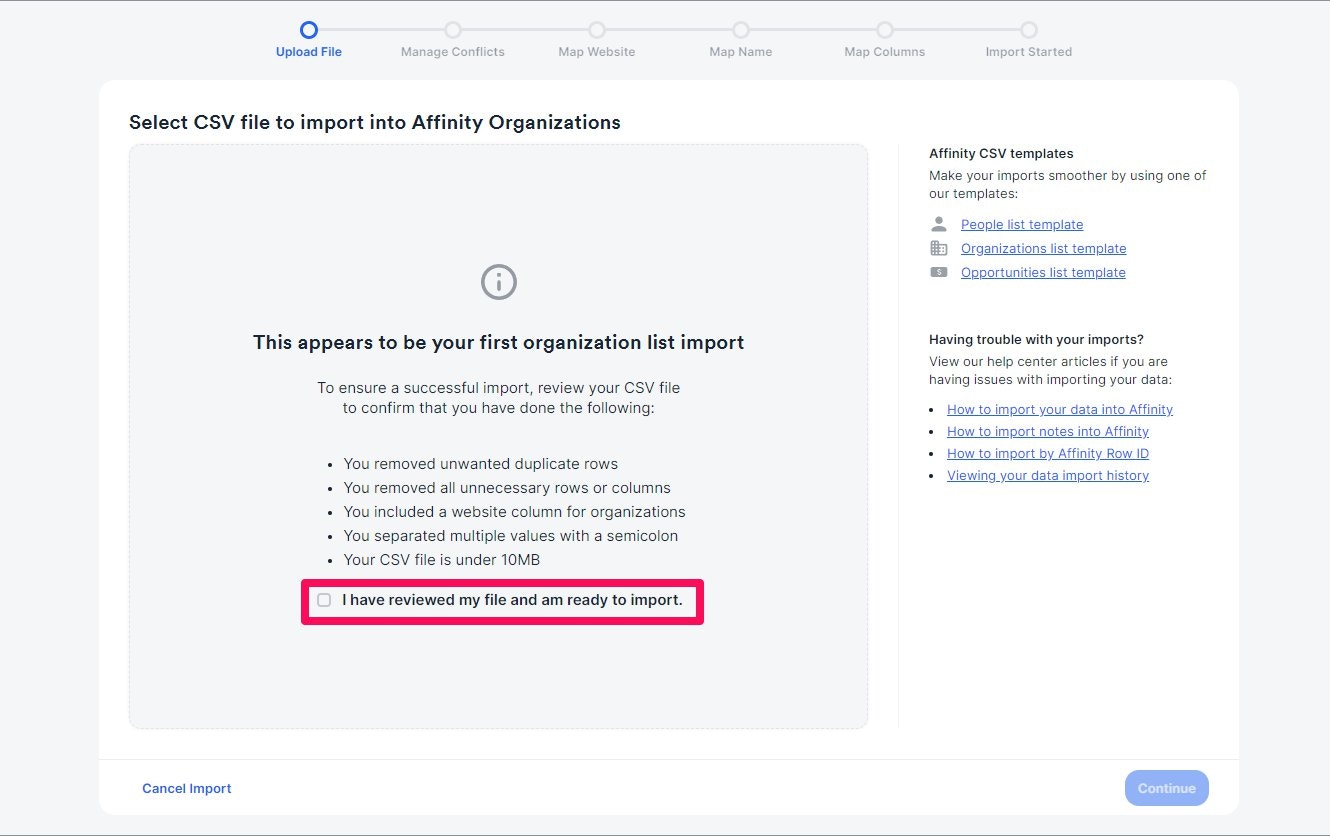
 3. Make sure to read through all bullet points to ensure the data in your CSV file are formatted correctly, then click the checkbox to confirm you've reviewed your CSV file.
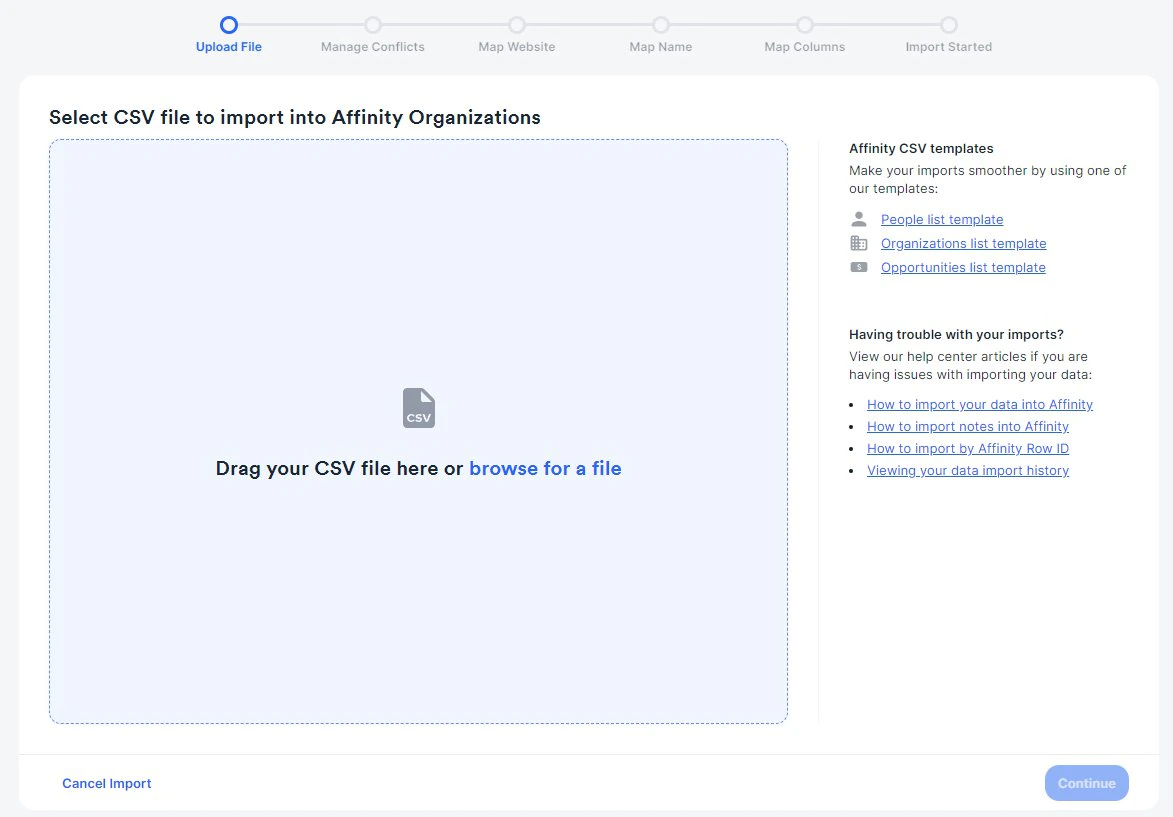
 4. Drag and drop or browse for a CSV file, then click **Continue**.
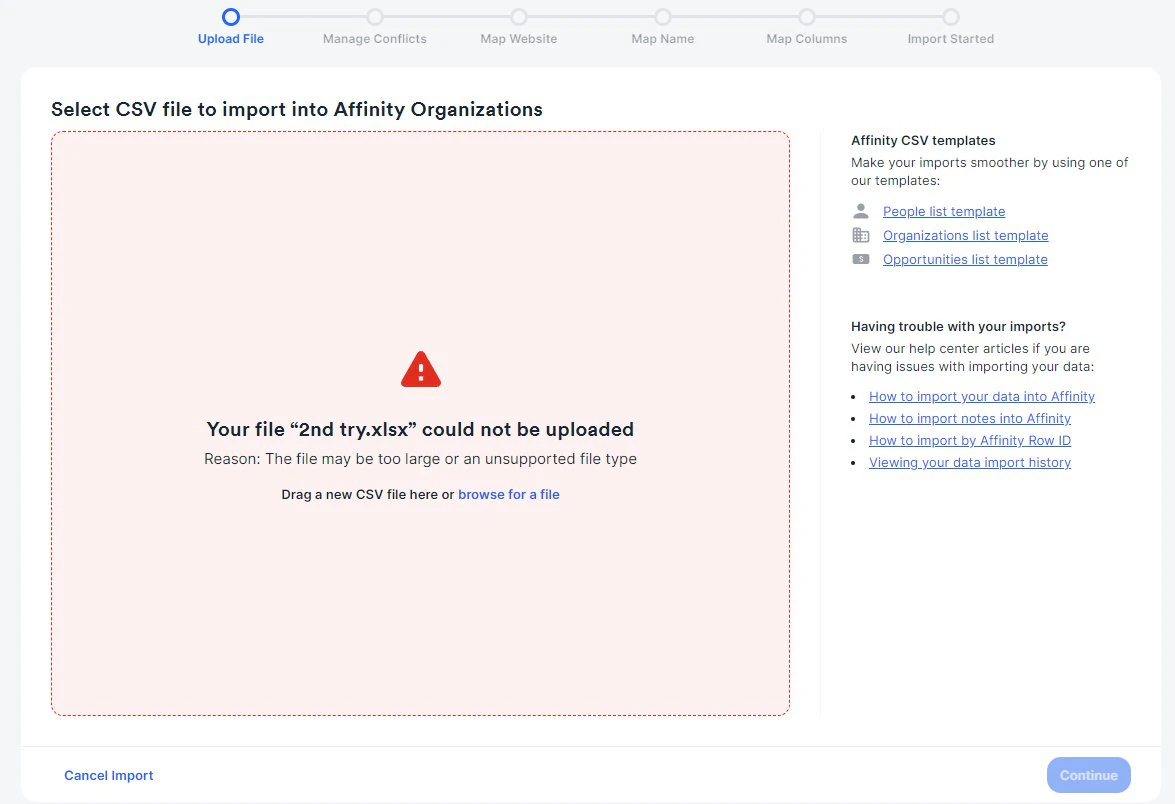
 5. Receiving an error message when trying to upload your CSV file? You can refer back to the common troubleshooting tips found in the section titled "Other Important Callouts" within this article: [Cleaning up your data before importing into Affinity](/s/article/Cleaning-up-your-data-before-importing-into-Affinity)
 ## 2. Choosing your preferred import option
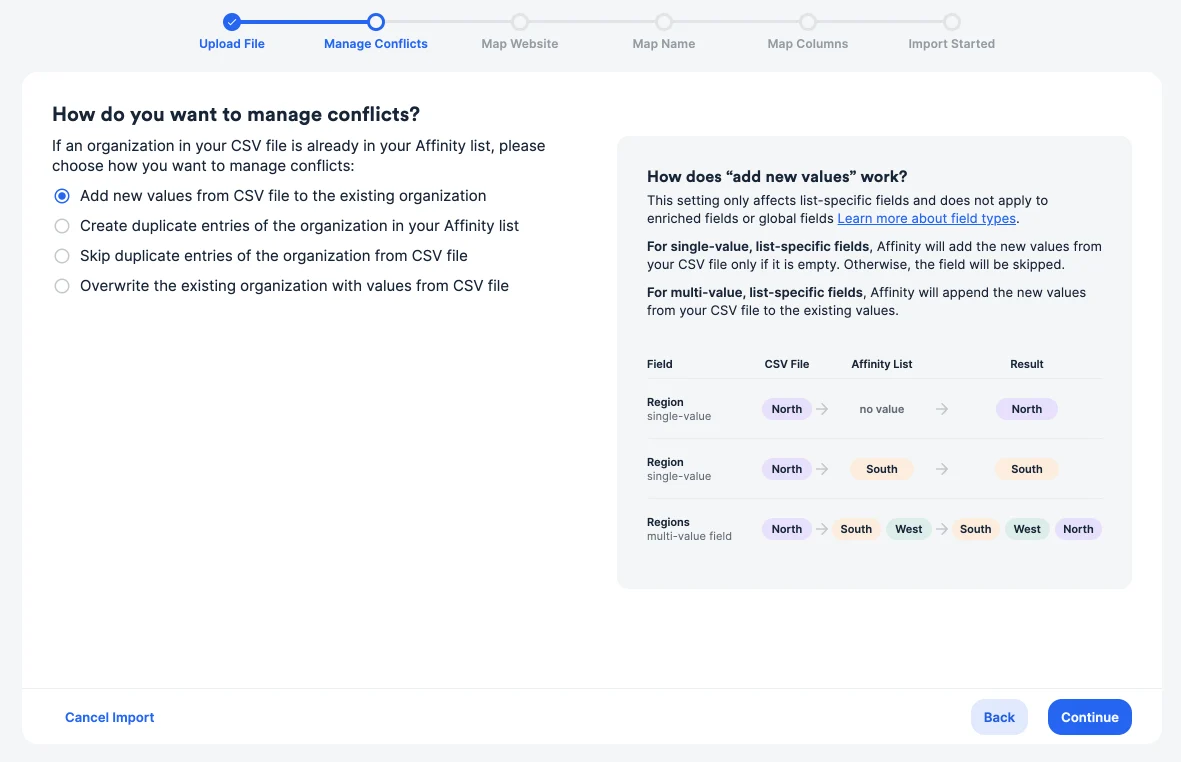
Once you've successfully uploaded the CSV file, select one of the following import options:
1. **Add new values from the CSV file to existing contacts:**
* This will add any additional values to a field if it is a multi-value field.
* If it is a single value field, we will add the values if the cell is empty, but skip if the cell already contains a value.
2. **Create duplicate entries of contacts in your Affinity list:**
* This will create a new entry for every imported row.
3. **Skip duplicate entries of contacts from the CSV file:**
* This will skip any rows from your CSV file that already exist on the list.
* For example, if Company A is on Row 4 in your CSV file and Company A is an entry on your Affinity list, then Row 4 will be skipped entirely and Company A on the Affinity list will remain untouched.
* **Tip:** This option is useful when you're importing data from another source frequently and only want to add new companies to your list and not update any existing ones.
4. **Overwrite existing values with values from the CSV file:**
* This will overwrite all cells in Affinity with the ones you import from your CSV file.
For this example, we only want to add new values from the CSV file, so we will choose to **Add new values from the CSV file to existing contacts**, then click **Next**.
## 2. Choosing your preferred import option
Once you've successfully uploaded the CSV file, select one of the following import options:
1. **Add new values from the CSV file to existing contacts:**
* This will add any additional values to a field if it is a multi-value field.
* If it is a single value field, we will add the values if the cell is empty, but skip if the cell already contains a value.
2. **Create duplicate entries of contacts in your Affinity list:**
* This will create a new entry for every imported row.
3. **Skip duplicate entries of contacts from the CSV file:**
* This will skip any rows from your CSV file that already exist on the list.
* For example, if Company A is on Row 4 in your CSV file and Company A is an entry on your Affinity list, then Row 4 will be skipped entirely and Company A on the Affinity list will remain untouched.
* **Tip:** This option is useful when you're importing data from another source frequently and only want to add new companies to your list and not update any existing ones.
4. **Overwrite existing values with values from the CSV file:**
* This will overwrite all cells in Affinity with the ones you import from your CSV file.
For this example, we only want to add new values from the CSV file, so we will choose to **Add new values from the CSV file to existing contacts**, then click **Next**.
 ## 3. Mapping the primary fields
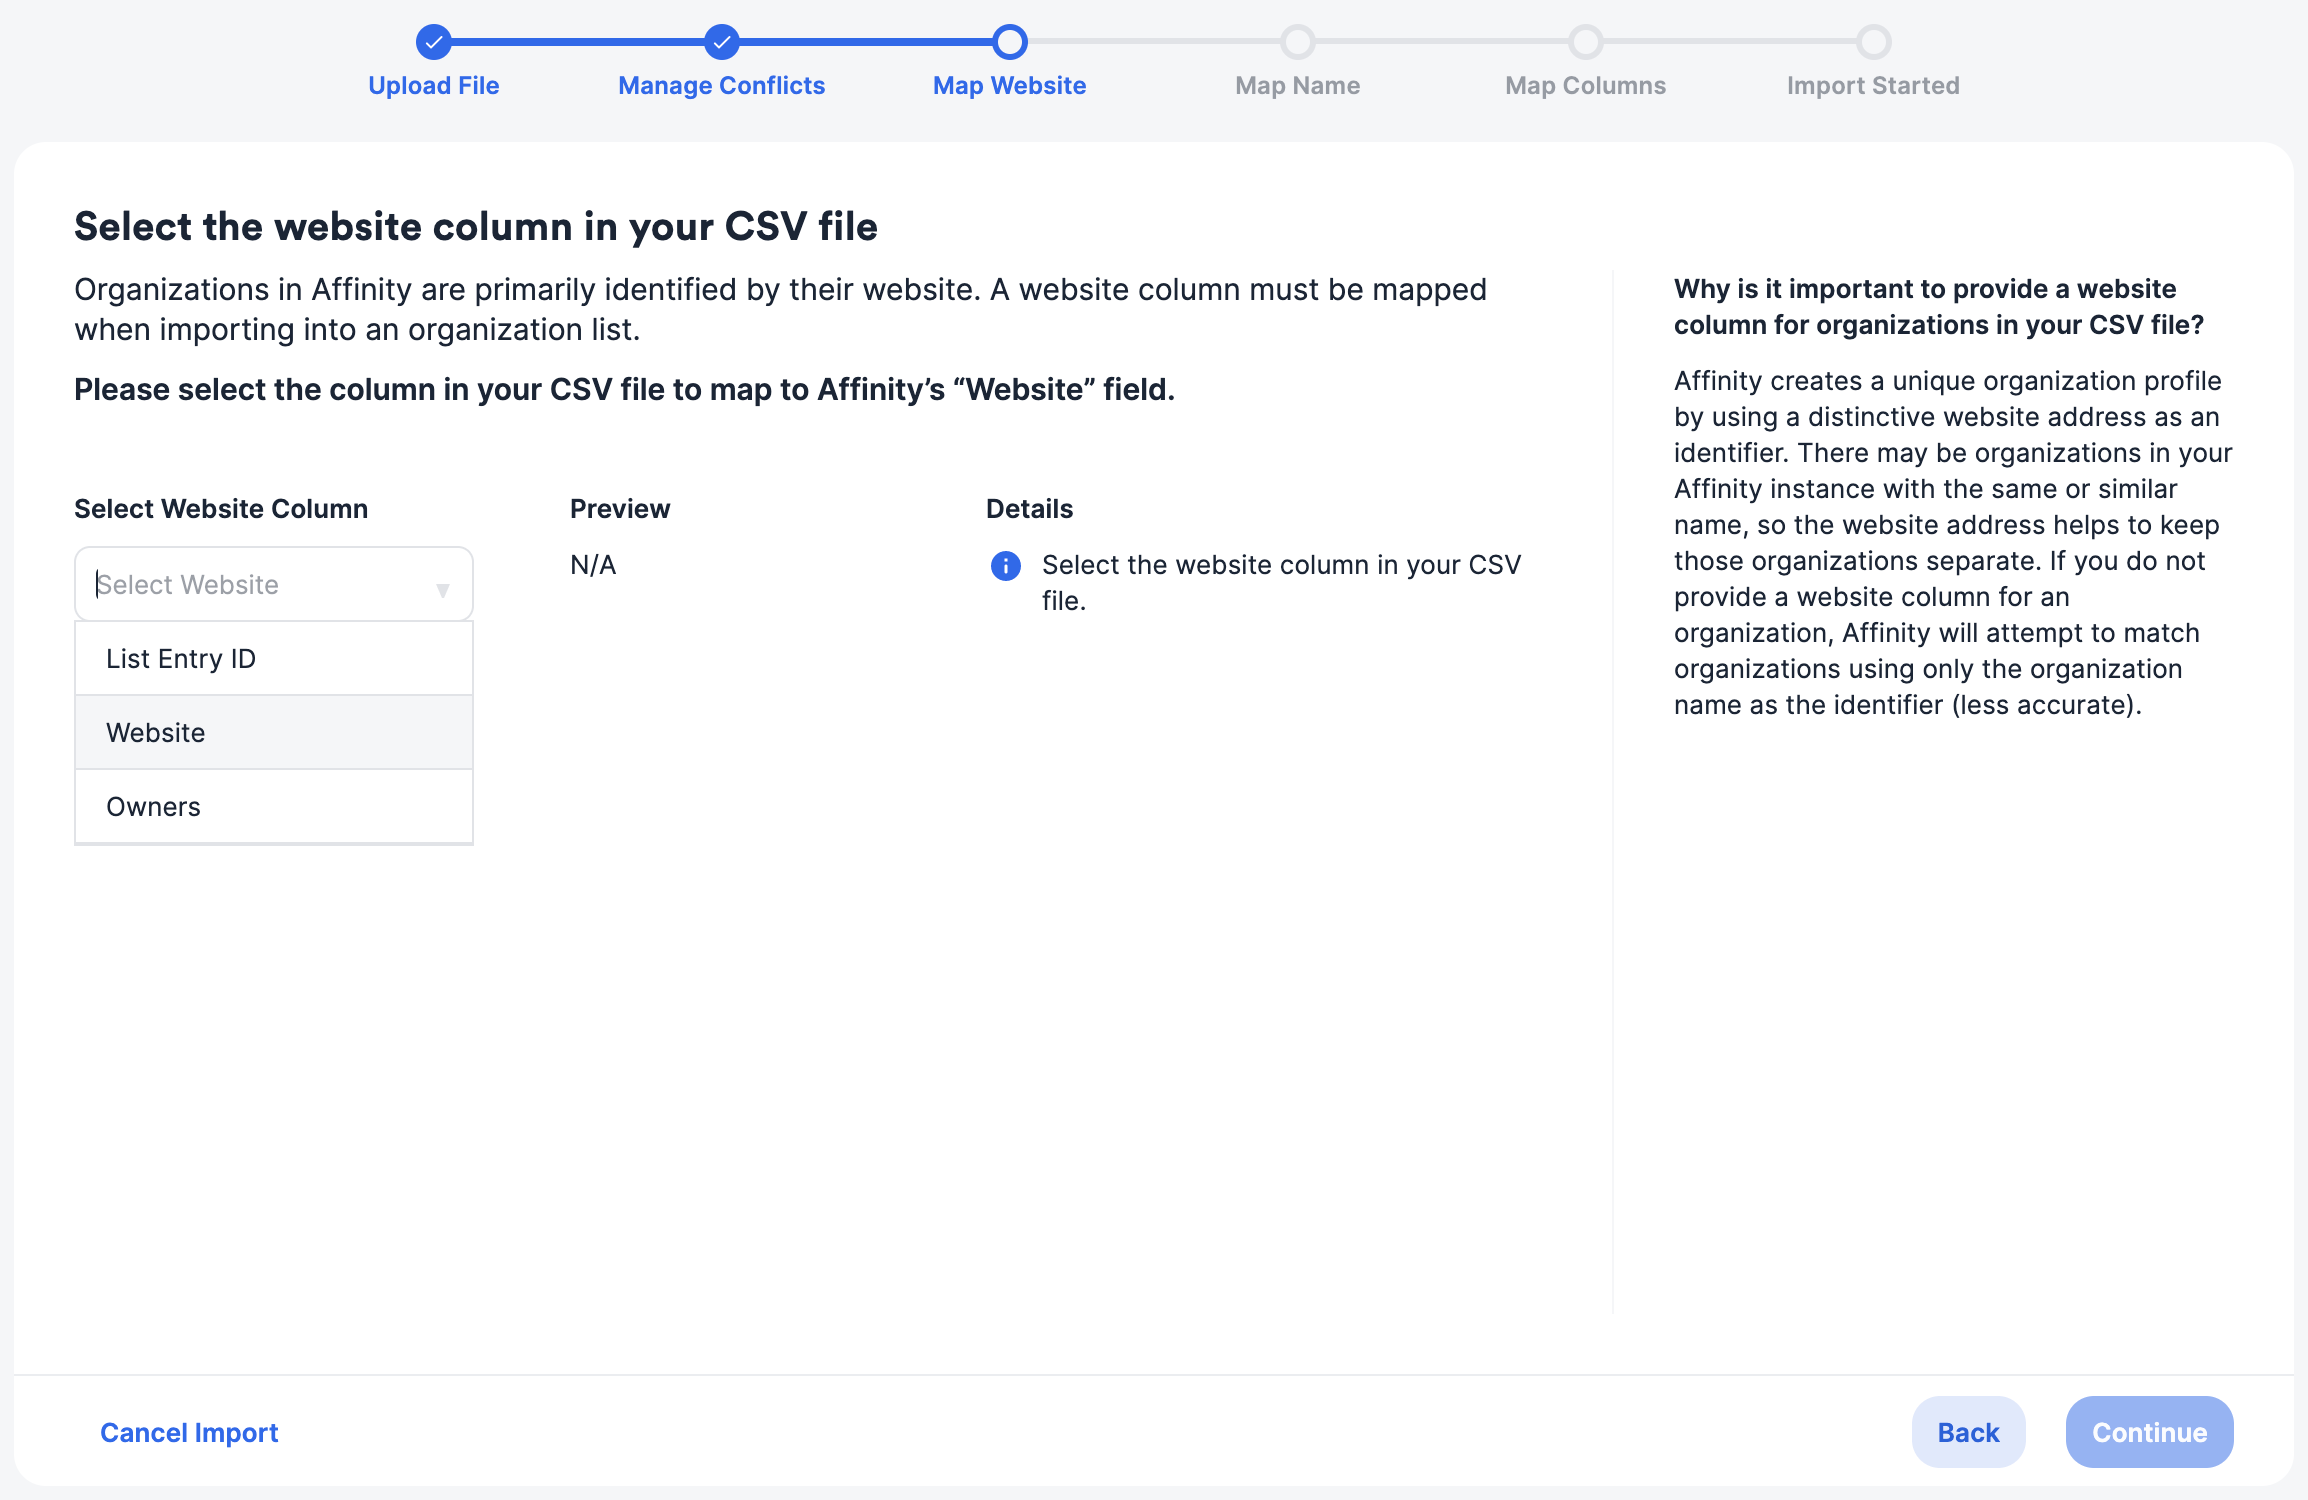
1. Map the **Website** column from the CSV file to the **Website** field in Affinity (required since the **Website** is the unique identifier when matching organizations from your CSV file to the organizations already existing in your account).
* For People lists, the unique identifier would be the **Email Address** column from the CSV file.
* For Opportunity lists, the unique identifier would be the **Opportunity Name** from the CSV file.
## 3. Mapping the primary fields
1. Map the **Website** column from the CSV file to the **Website** field in Affinity (required since the **Website** is the unique identifier when matching organizations from your CSV file to the organizations already existing in your account).
* For People lists, the unique identifier would be the **Email Address** column from the CSV file.
* For Opportunity lists, the unique identifier would be the **Opportunity Name** from the CSV file.
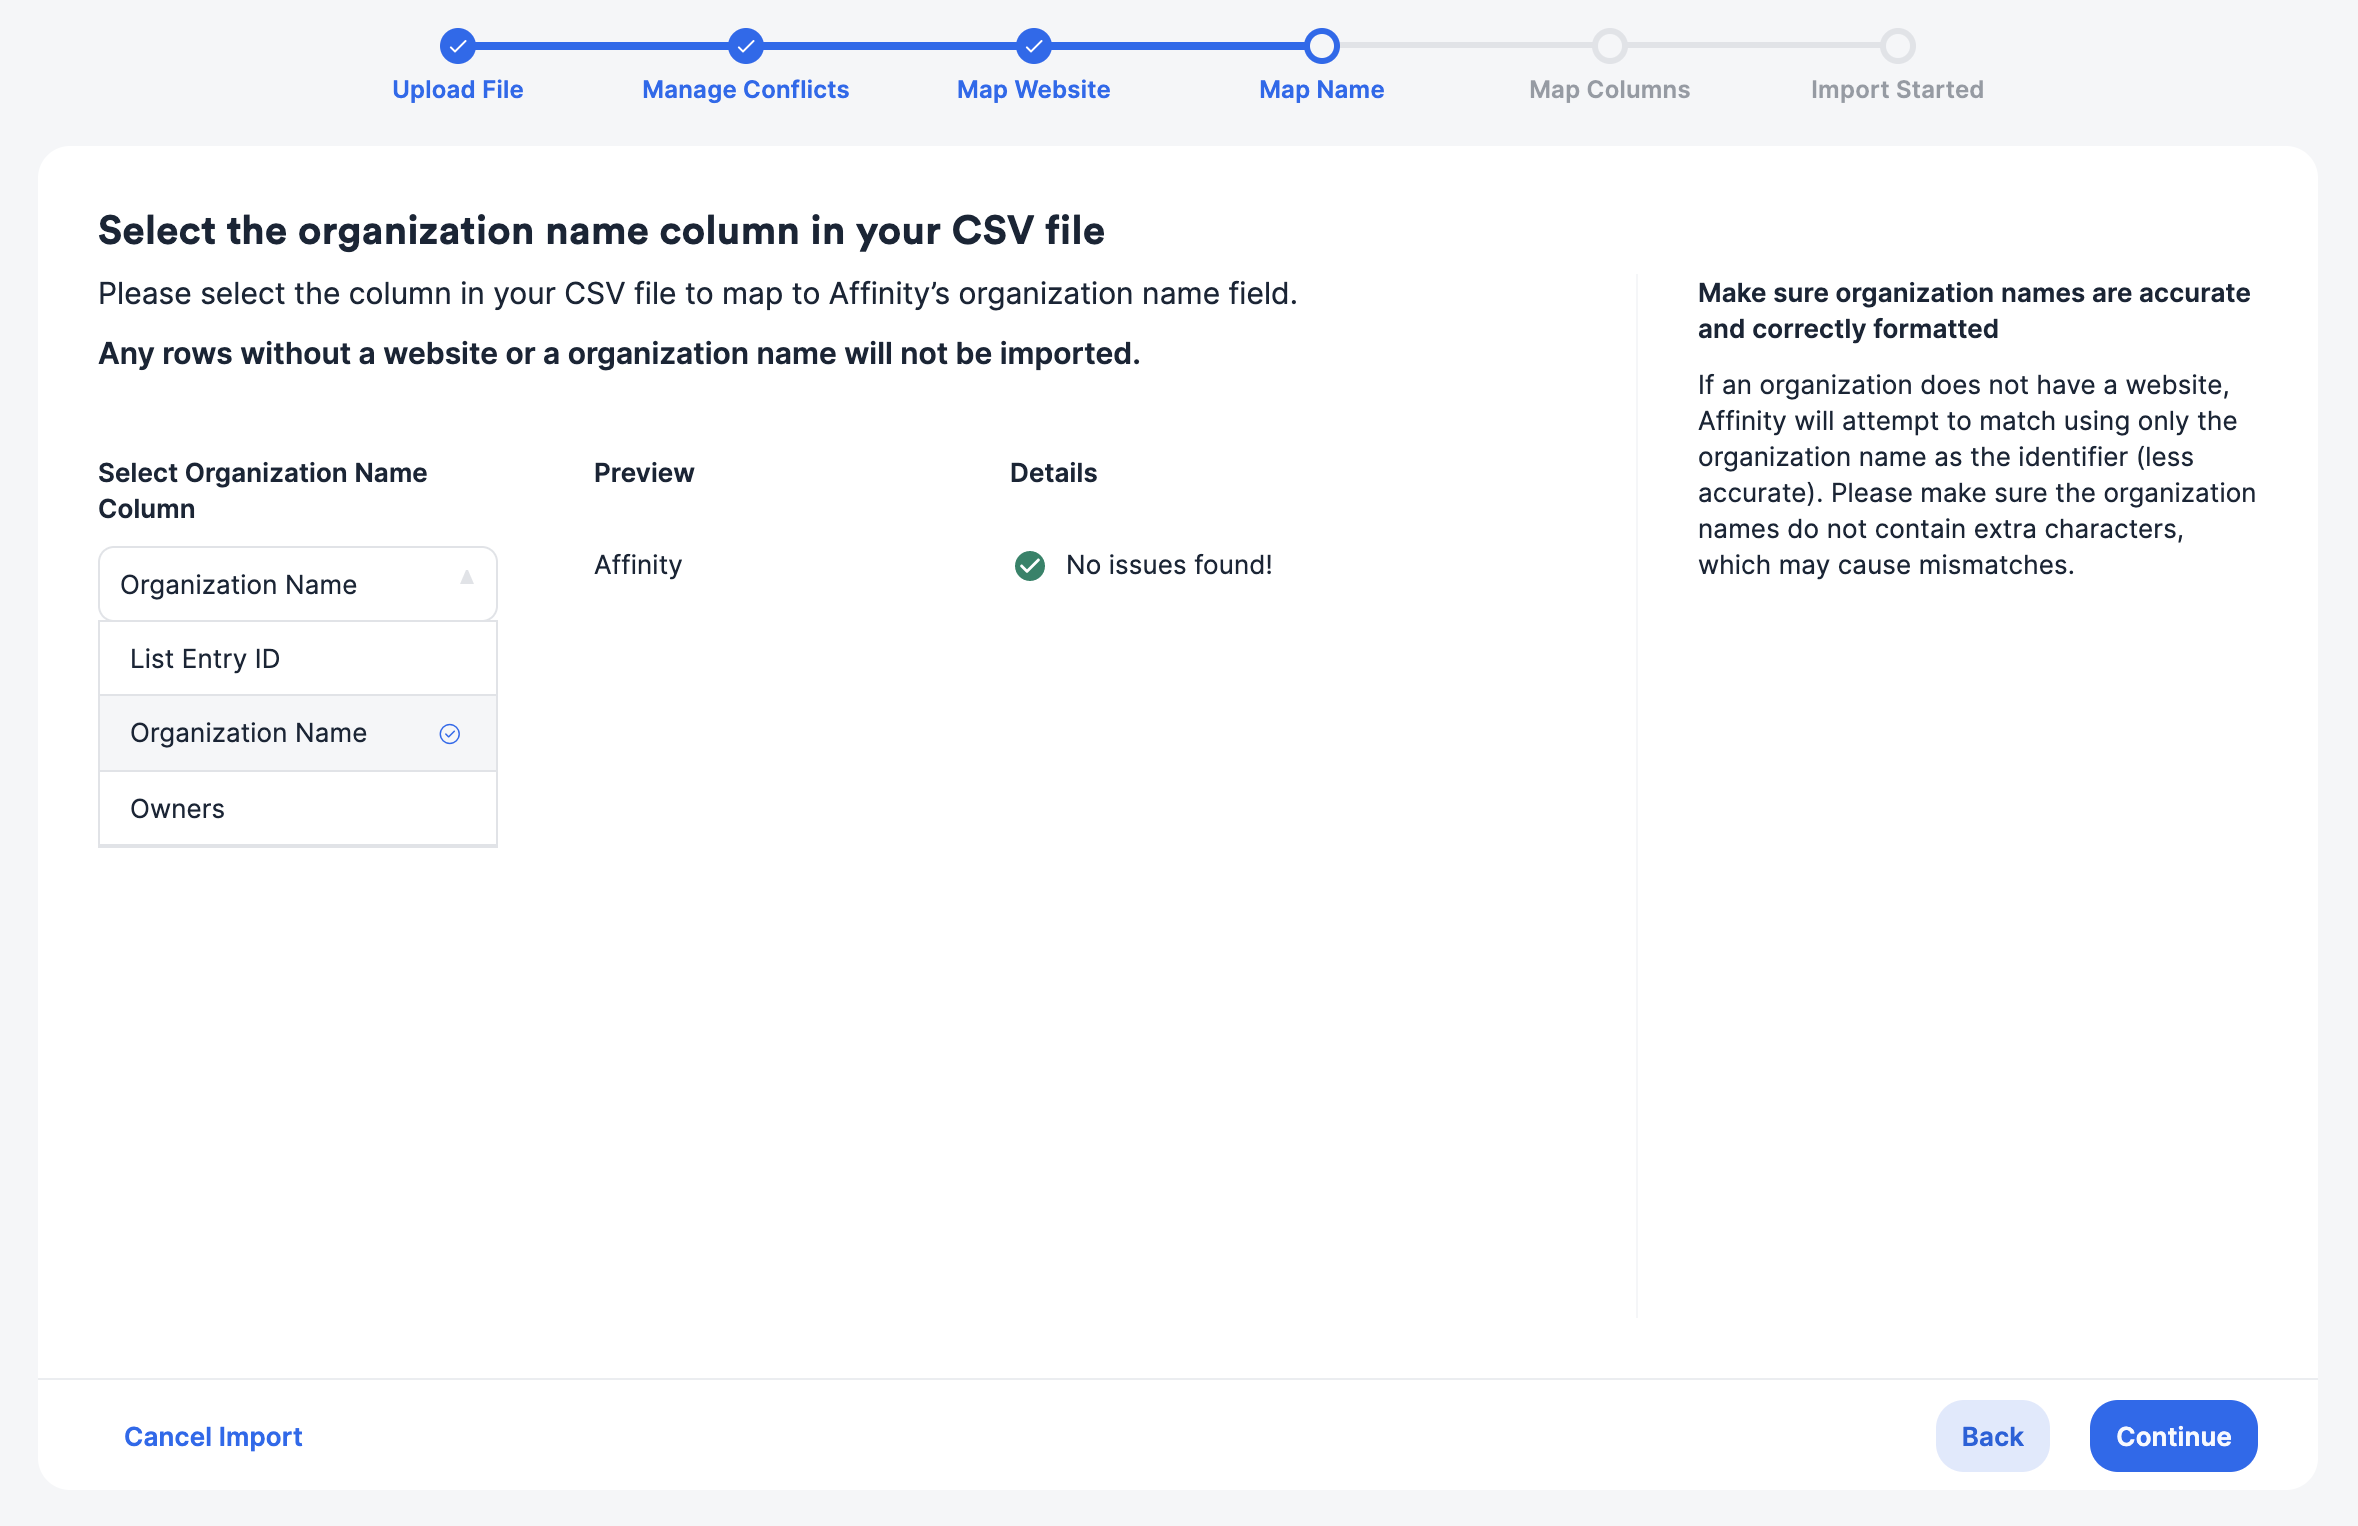
 2. Map the **Organization Name** column from your CSV file to the **Organization Name** field in Affinity (the **Organization Name** is required when importing into organization lists).
* The **Full Name** column from the CSV file is required when importing into people lists.
* The **Opportunity Name** column from the CSV file is required when importing into opportunity lists.
2. Map the **Organization Name** column from your CSV file to the **Organization Name** field in Affinity (the **Organization Name** is required when importing into organization lists).
* The **Full Name** column from the CSV file is required when importing into people lists.
* The **Opportunity Name** column from the CSV file is required when importing into opportunity lists.
 ## 4. Mapping the remaining fields
Now that we have determined which specific organizations to import data into, map the rest of the columns from the CSV file to the relevant Affinity field.
## 4. Mapping the remaining fields
Now that we have determined which specific organizations to import data into, map the rest of the columns from the CSV file to the relevant Affinity field.
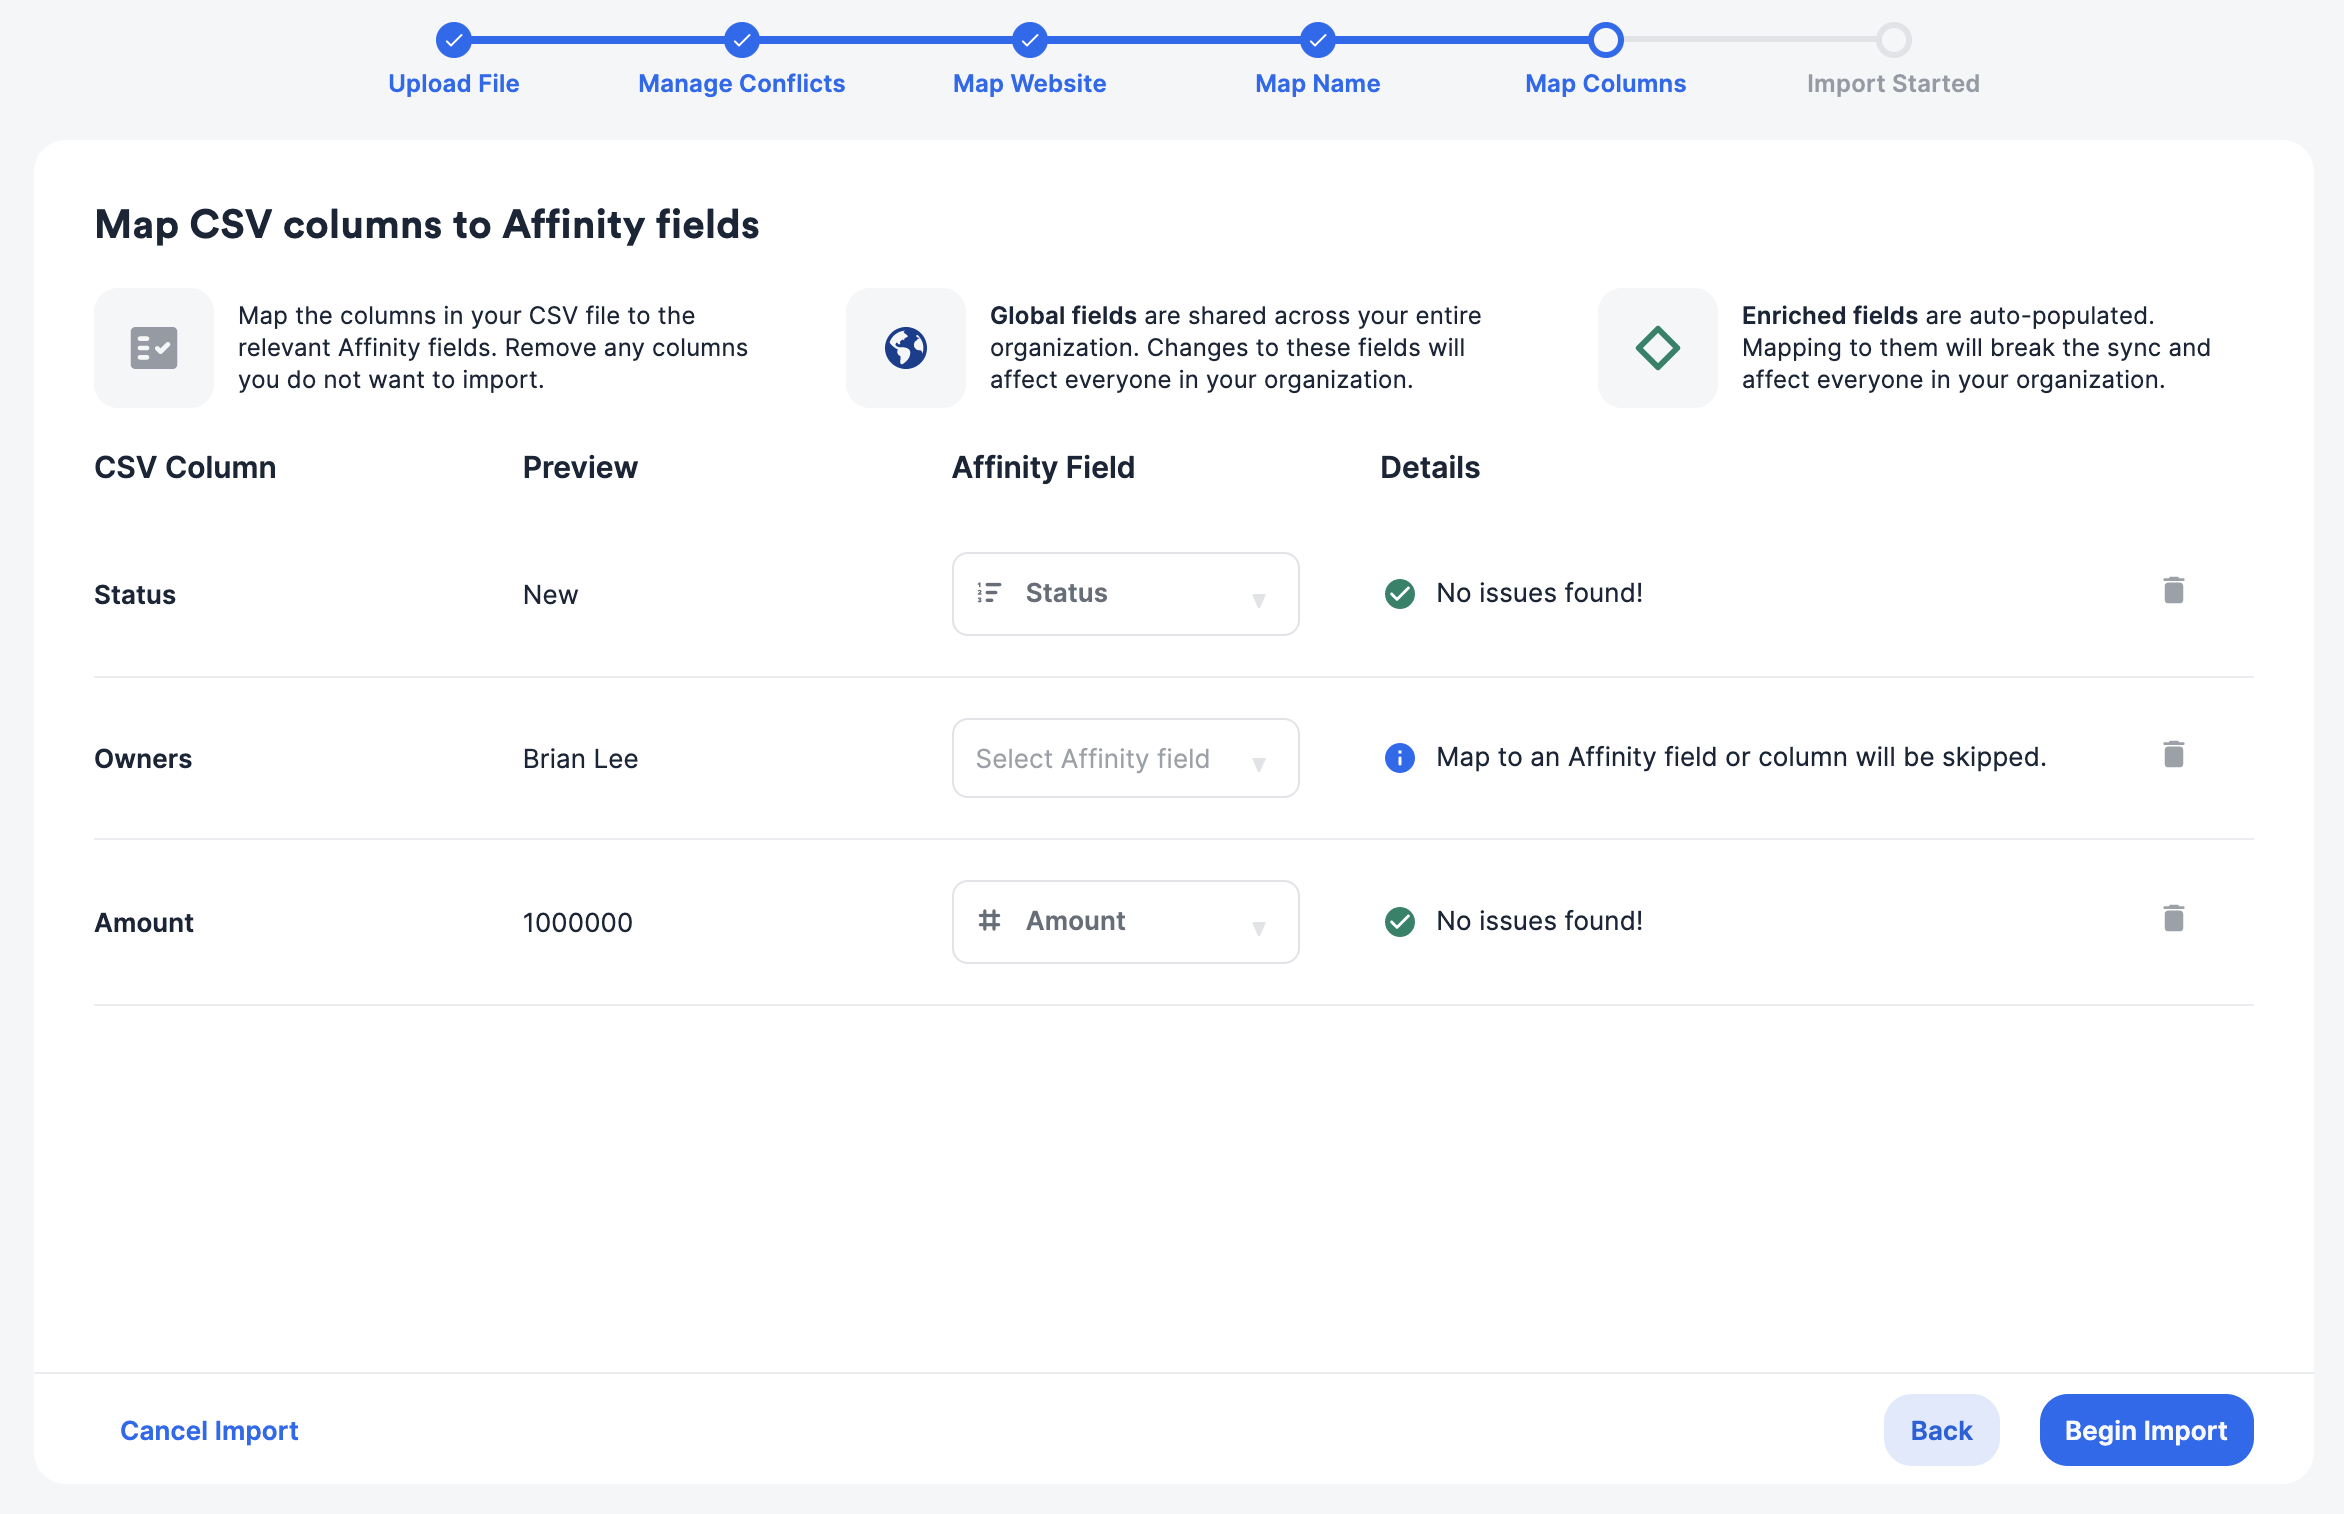 1. Select the relevant Affinity Field for each CSV column by clicking on the dropdown. You can also type the name of the column you are looking for after clicking on the dropdown.
2. Please note, some fields will be auto-mapped for your convenience, but we will not auto-map to people-type, organization-type, and location-type fields since they require multiple fields to map to specific attributes:
1. Person - Full Name, Email Address
2. Organization - Name, Domain
3. Location - City, Address, Country
3. If there are any **global fields** that you are mapping to, you will be asked which method you'd like to choose for updating global fields. Feel free to refer back to the explanations found in Section: 2. Choosing your preferred import option.
1. Select the relevant Affinity Field for each CSV column by clicking on the dropdown. You can also type the name of the column you are looking for after clicking on the dropdown.
2. Please note, some fields will be auto-mapped for your convenience, but we will not auto-map to people-type, organization-type, and location-type fields since they require multiple fields to map to specific attributes:
1. Person - Full Name, Email Address
2. Organization - Name, Domain
3. Location - City, Address, Country
3. If there are any **global fields** that you are mapping to, you will be asked which method you'd like to choose for updating global fields. Feel free to refer back to the explanations found in Section: 2. Choosing your preferred import option.
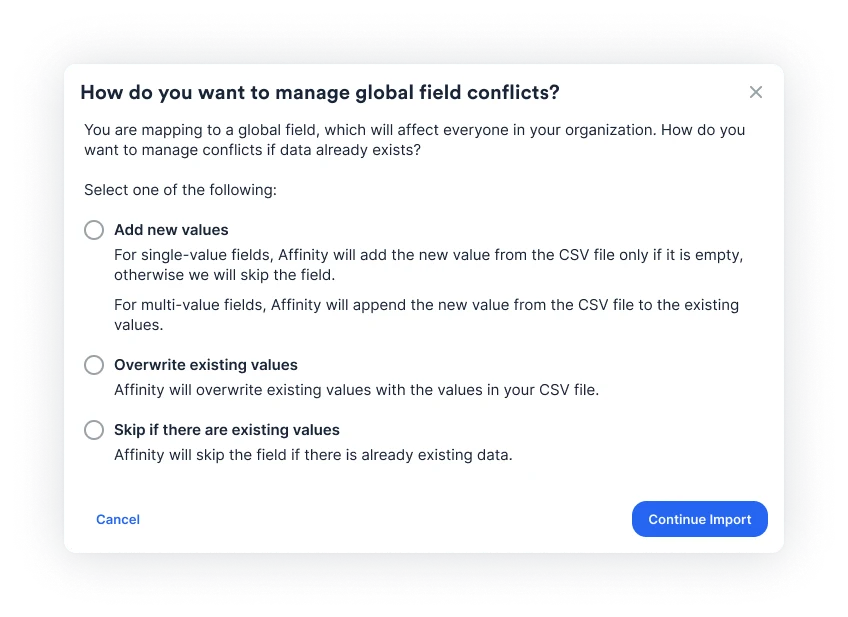 4. Now, **remove** any columns from your CSV that you don't want to upload by clicking on the **Trash icon**.
5. Use the **Backspace** button on your keyboard to remove a selection from the dropdown.
6. Once you're finished mapping, click **Begin import**.
Please note that you **may** perform imports into more than a one list at a given time.
## 5. After importing
Now that you've begun your import, here's what you can expect:
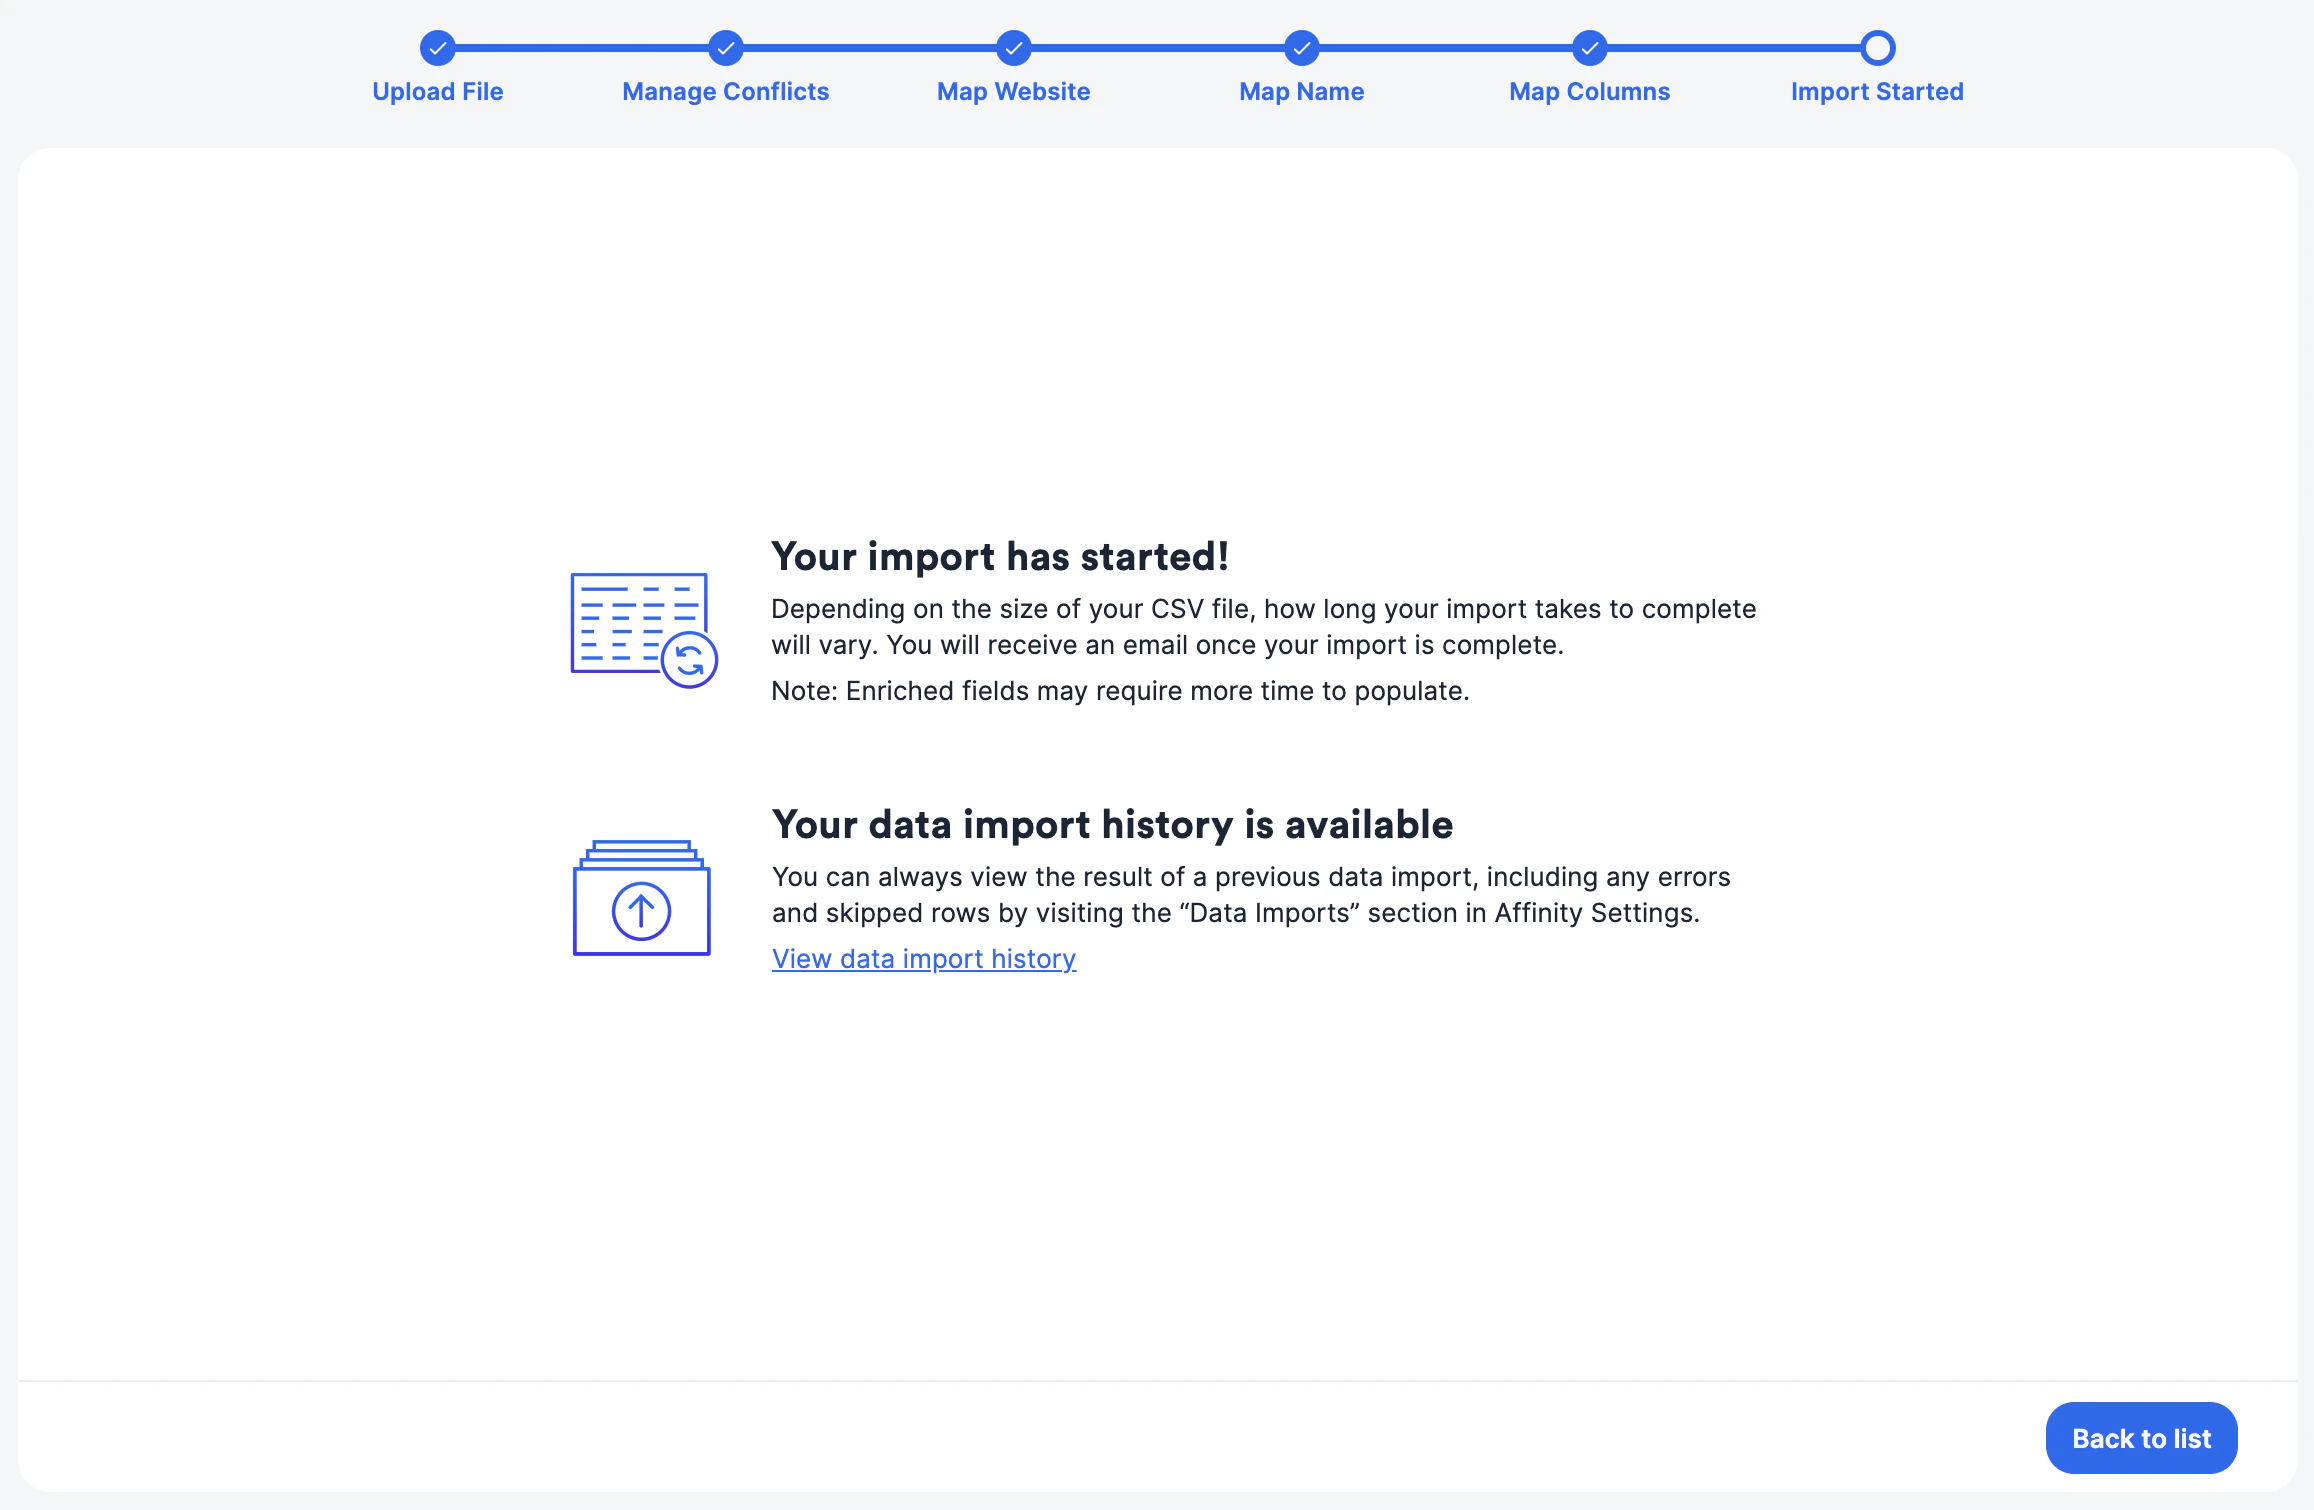
1. Most imports average 5 to 15 minutes to process. For larger files, it may take up to 24 hrs for your data to process.
2. Once your import finishes, you will receive an **email notification** and an **in-product notification** under the **Notification icon** in the top right corner.
3. View your [import history](/s/article/Viewing-your-data-import-history) to see the results of your import where you can view or download:
* Skipped Rows
* Errors
* Original CSV file
4. For any errors or skipped rows above, download the CSV to fix the issues and import those separately to complete your import.
4. Now, **remove** any columns from your CSV that you don't want to upload by clicking on the **Trash icon**.
5. Use the **Backspace** button on your keyboard to remove a selection from the dropdown.
6. Once you're finished mapping, click **Begin import**.
Please note that you **may** perform imports into more than a one list at a given time.
## 5. After importing
Now that you've begun your import, here's what you can expect:
1. Most imports average 5 to 15 minutes to process. For larger files, it may take up to 24 hrs for your data to process.
2. Once your import finishes, you will receive an **email notification** and an **in-product notification** under the **Notification icon** in the top right corner.
3. View your [import history](/s/article/Viewing-your-data-import-history) to see the results of your import where you can view or download:
* Skipped Rows
* Errors
* Original CSV file
4. For any errors or skipped rows above, download the CSV to fix the issues and import those separately to complete your import.
 5. If you need to **undo an import**, you can find out more in our [Undo Imports](/s/article/How-to-undo-imports-in-Affinity) article.